Hi!
How can I position a 3D object/shape in Aximmetry composer in the scene to mark a specific area and only use it for a mask? And obviously not have the object visible in the final composite. I'm sure this is doable and might figure it out, but it's a tad tricky with a tracked/moving camera.
To give an concrete example of a use case, i might want to position a 3D plane and align it with the floor exactly where my talent is standing. Then I'd composite this plane as white over black background to achieve a perfectly tracked floor area mask for a talent. This would be useful for so many things like fixing more area specific keying problems or for example keying real shadows, color grading, fx in post, whatever. This mask could be used in real time comp in Aximmetry as well as recorded separately as a tool for post production treatment.
Currently I can create the 3D object and get the tracking data to move the camera that is capturing the object, but I haven't yet figured out how to position and align the object to match a specific spot exactly in the actual scene/studio.
I would love to learn to do this in Aximmetry composer.
It would also be great to know if it is possible in UE to position a 3D object in the scene and then only use it as a mask in Aximmetry and not have it affect the final composite in composer. Sometimes you might deciede the spot for the talent already when creating the scene in UE, then it would be convenient to just put a plane or shape at the spot and make it transparent or somehow invisible to the comp and just access it somehow in composer to turn it into a mask.
Then sometimes it would be necessary to be able to quickly create a floor area mask in composer instead. So interested to learn both workflows if possible.
Also, if I can get that far, wonder if it was possible to somehow draw a shape to use as a more complex floor/surface mask positioned in 3D space? Since I know Aximmetry has tools for painting and a 2D mask would be sufficent for the task as long as it was just laid on the right surface correctly. I'm aware this could be achieved with creating custon 3D shapes in like blender and importing, this paint method could just be crazy fast and great for certain situations.
Thanks in advance!
Emil


Hi Emil,
What you should keep in mind is that (render) cameras are not very resource extensive in Aximmetry, especially if you are only rendering a plane for a mask with it.
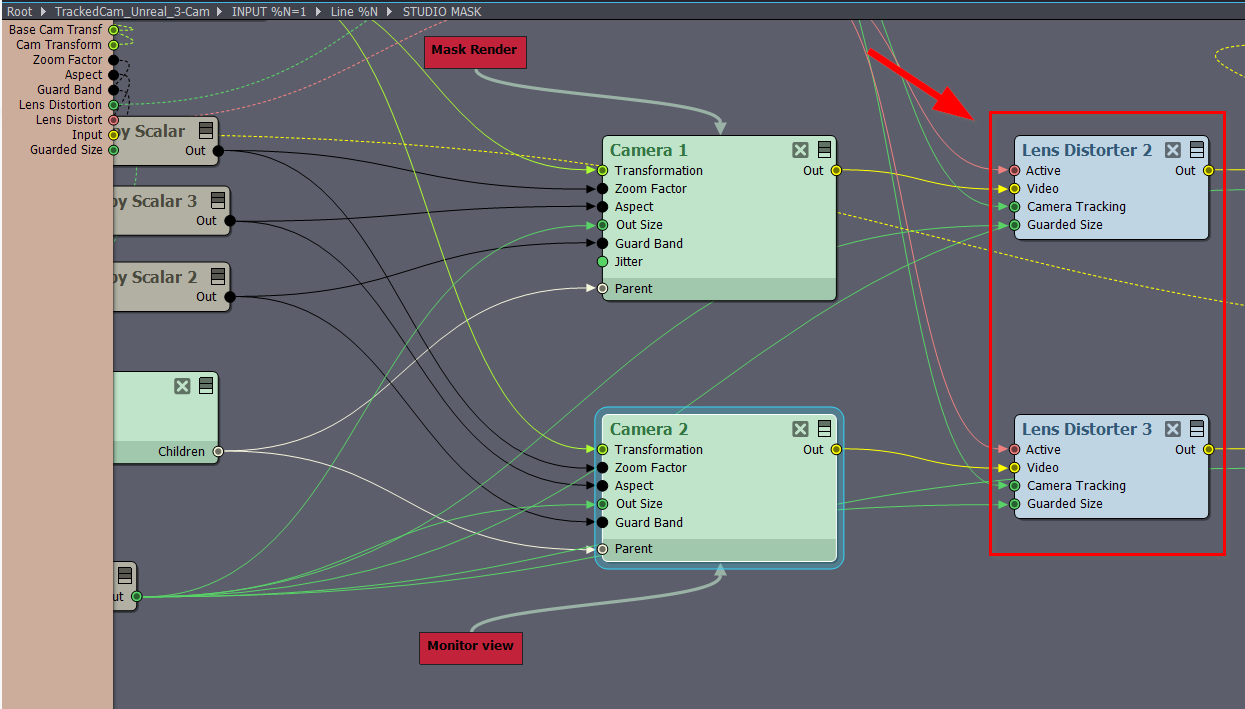
First, you can get the camera's location from the Camera compounds using a Transmit Transformation module, where the From Tunnel pin is set to CAMERA TRANSFORMATION.
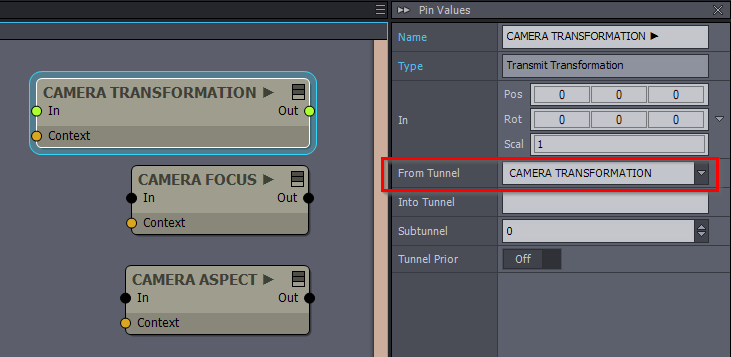
You can also get the Camera's focus and aspect in a similar manner using the Transmit Scalar modules.
The advantage of this is that you can do this without opening the linked camera compound.
You can read more about tunnels here: https://aximmetry.com/learn/virtual-production-workflow/preparation-of-the-production-environment-phase-i/scripting-in-aximmetry/flow-editor/pin/#transmit-modules
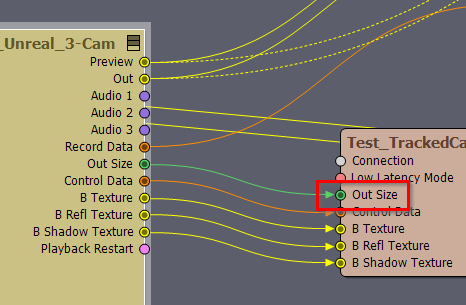
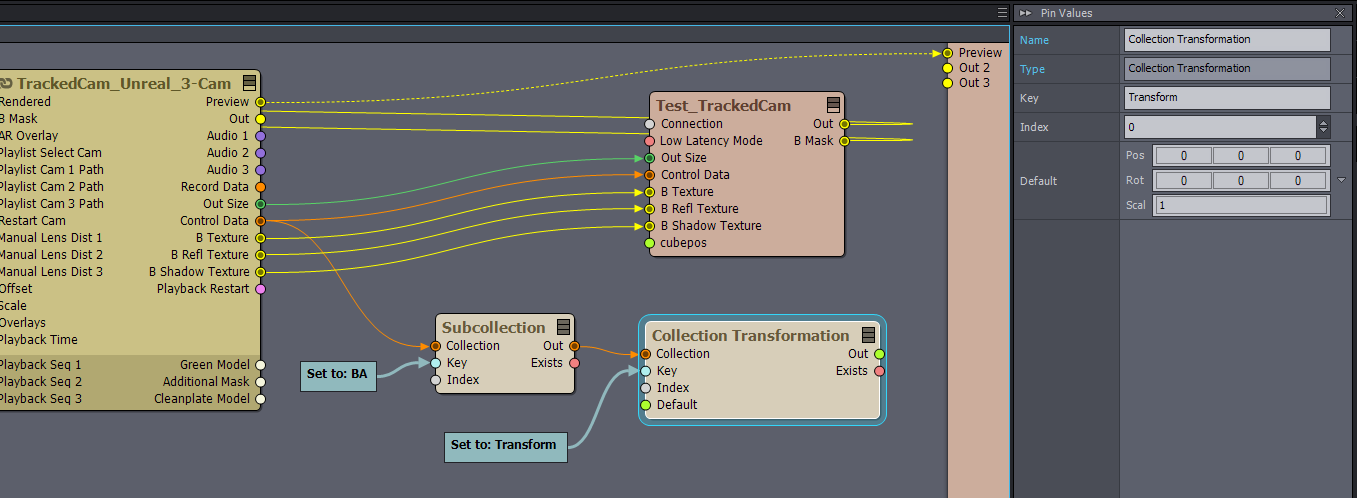
You can get the billboard's location from the Control Data collection. It is located in the BA subcollection's Transform key:
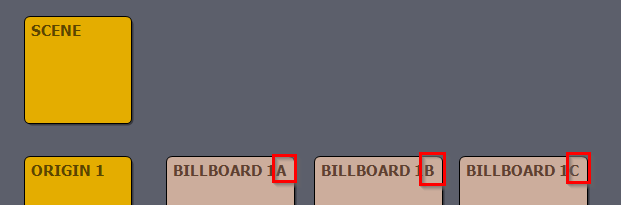
If you are using more than 1 billboard per camera, then they are located in the BA, BB, and BC subcollections.
You can read more about tunnels here: https://aximmetry.com/learn/virtual-production-workflow/preparation-of-the-production-environment-phase-i/scripting-in-aximmetry/flow-editor/collection-for-databases/
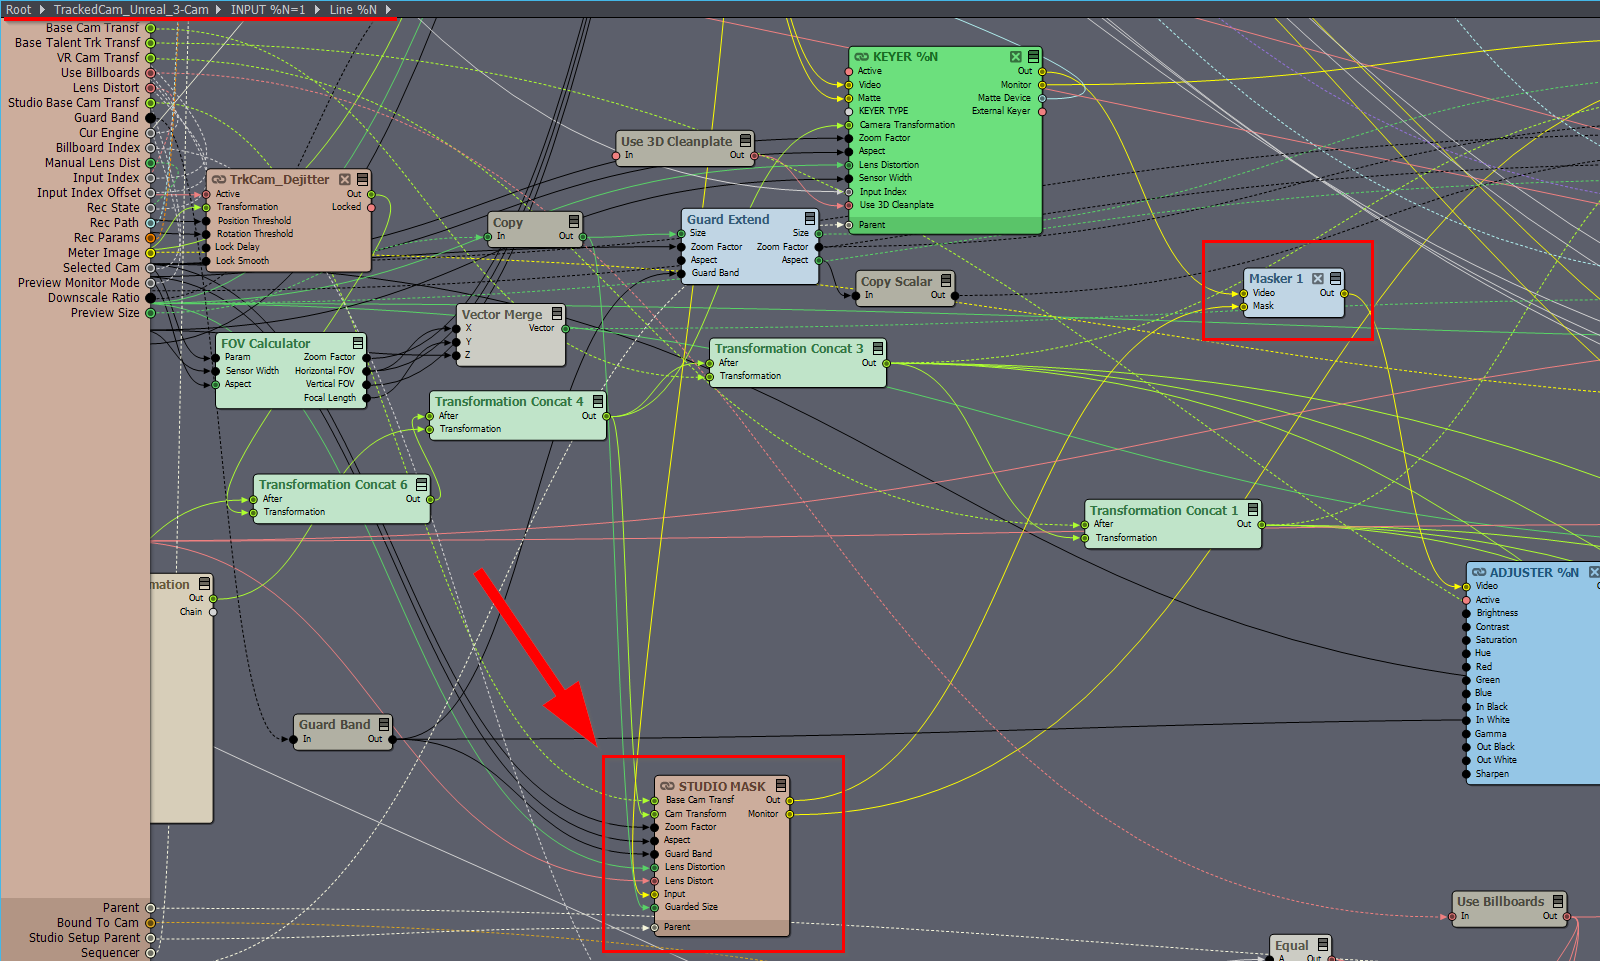
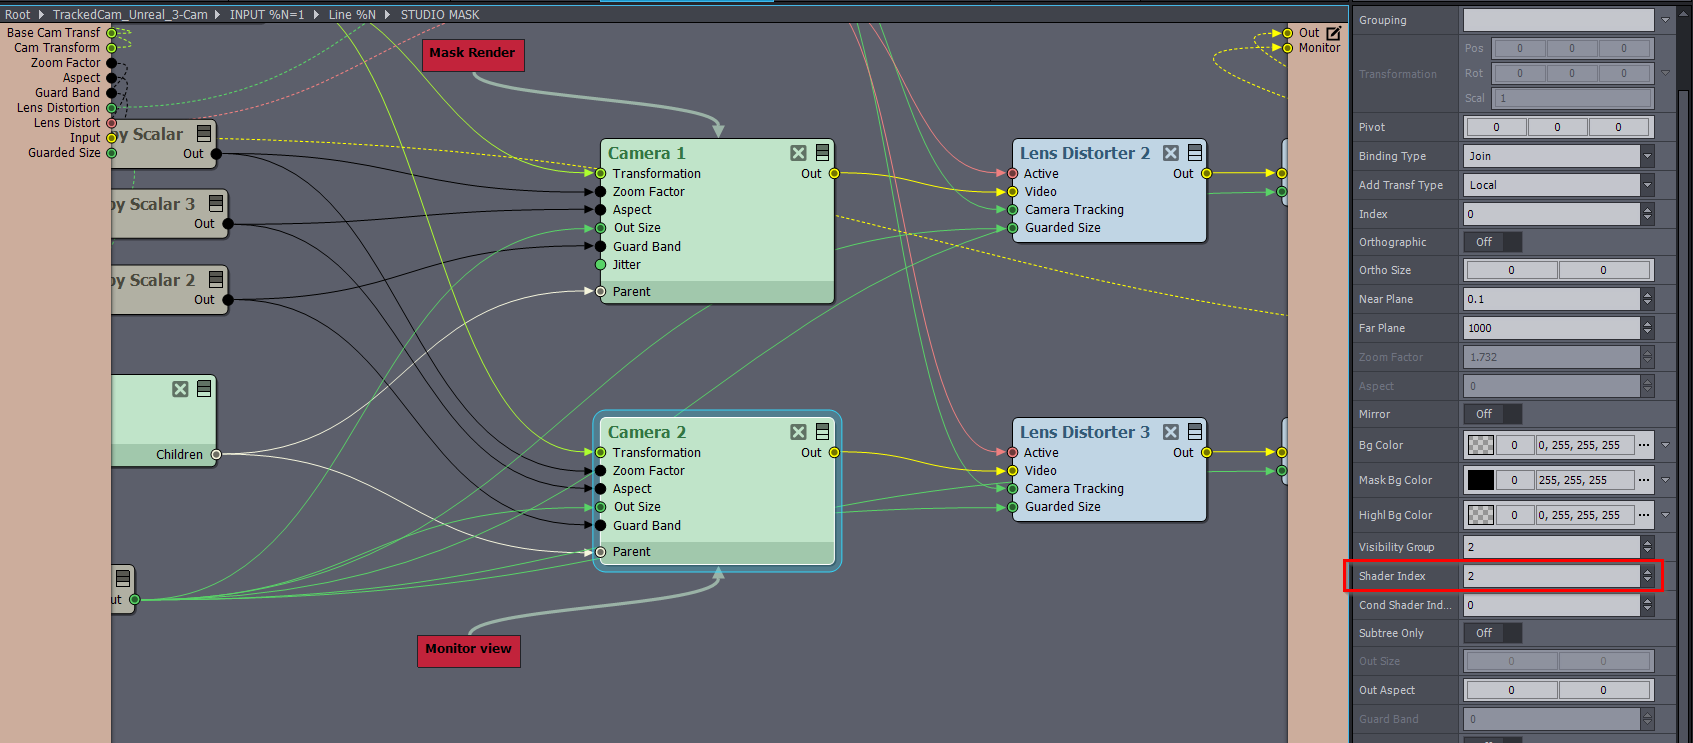
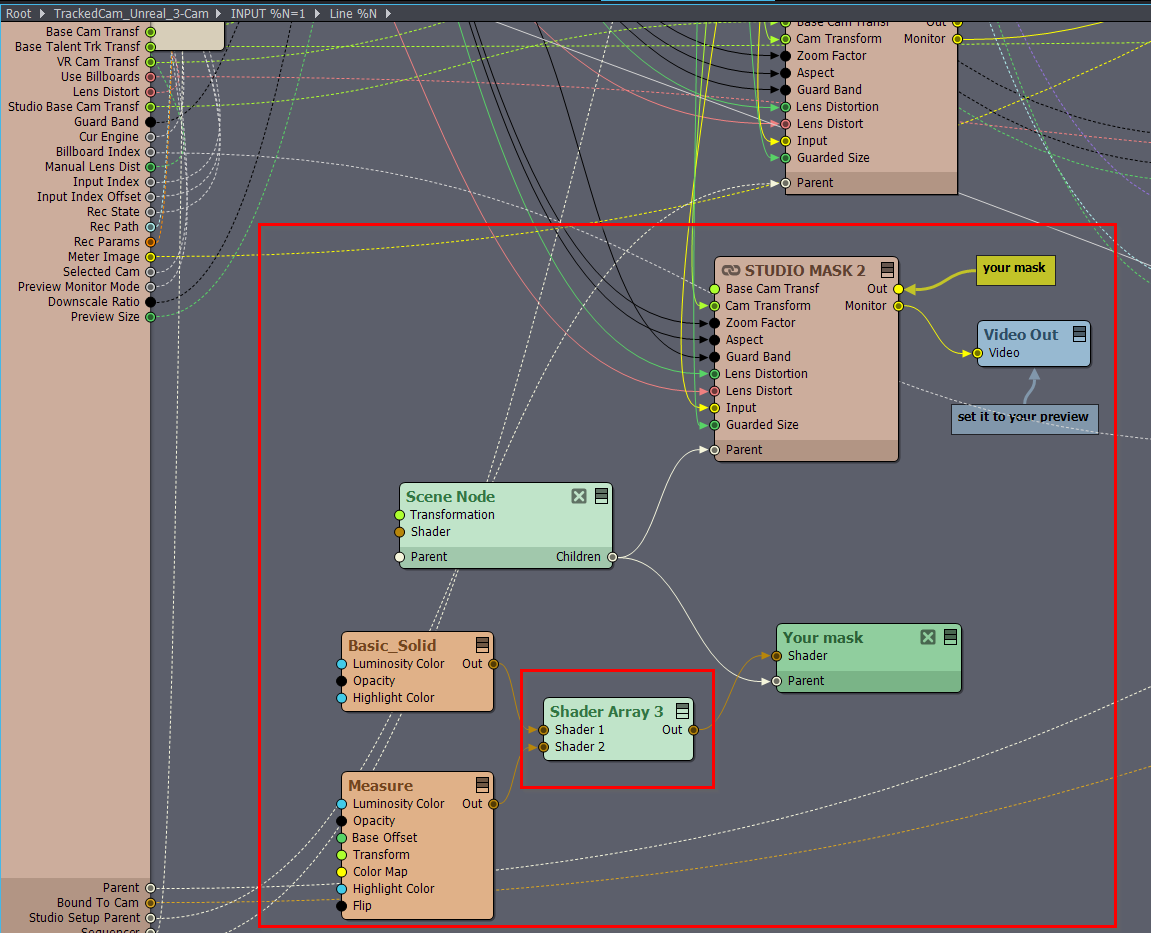
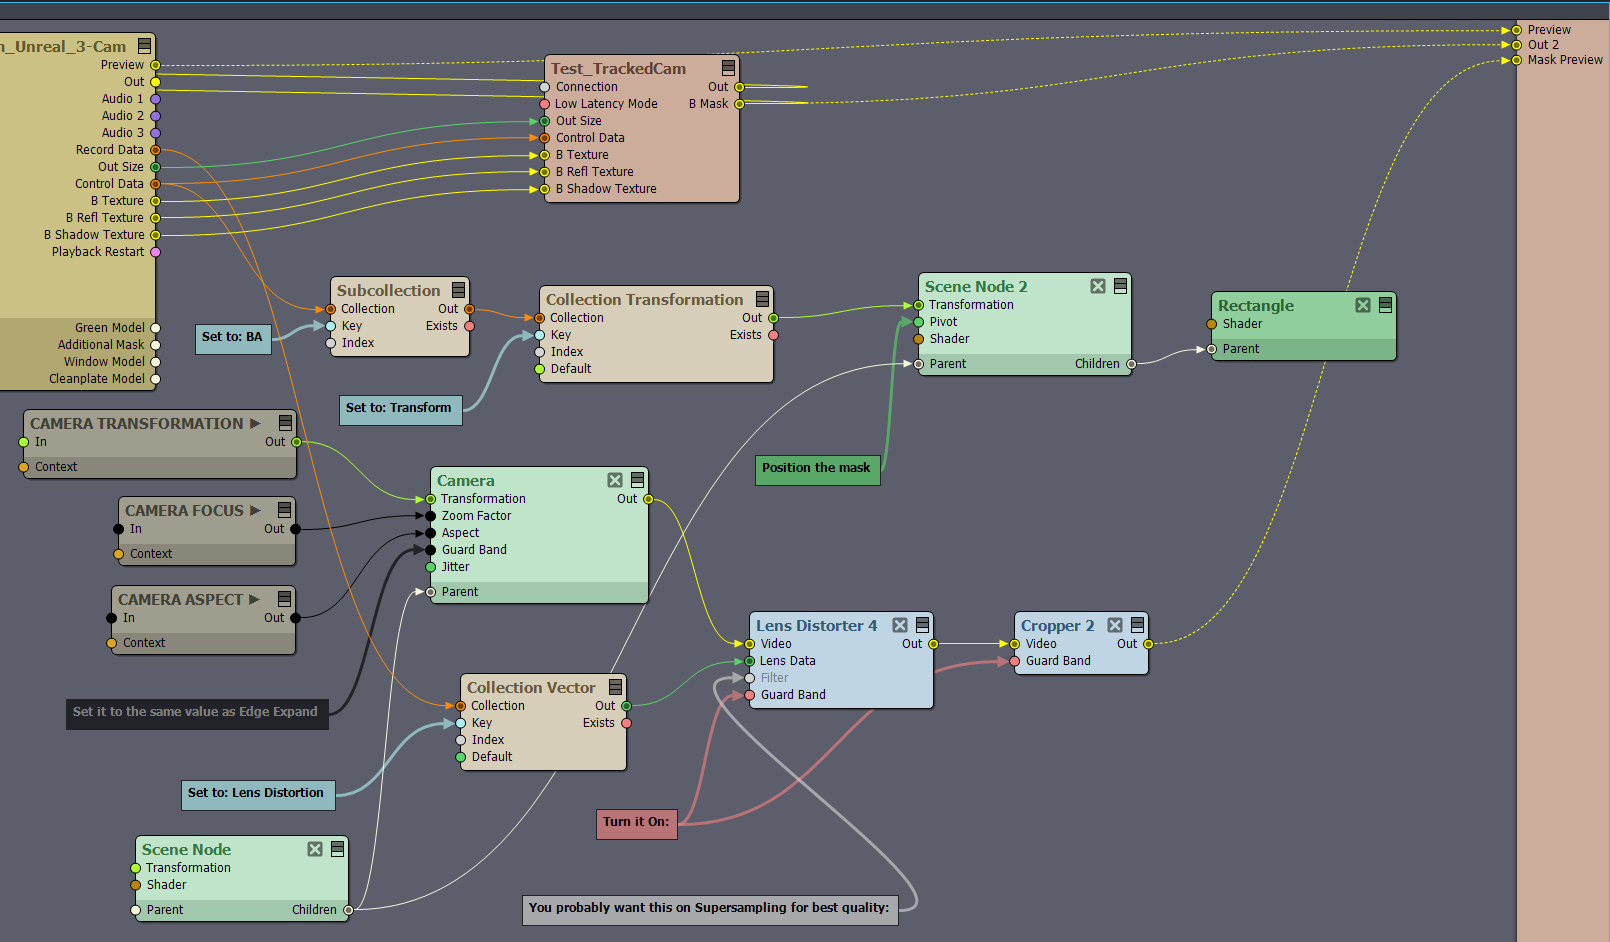
Now, for example, you can easily render a mask at the location of your billboard from the perspective of your current camera using this flow logic.
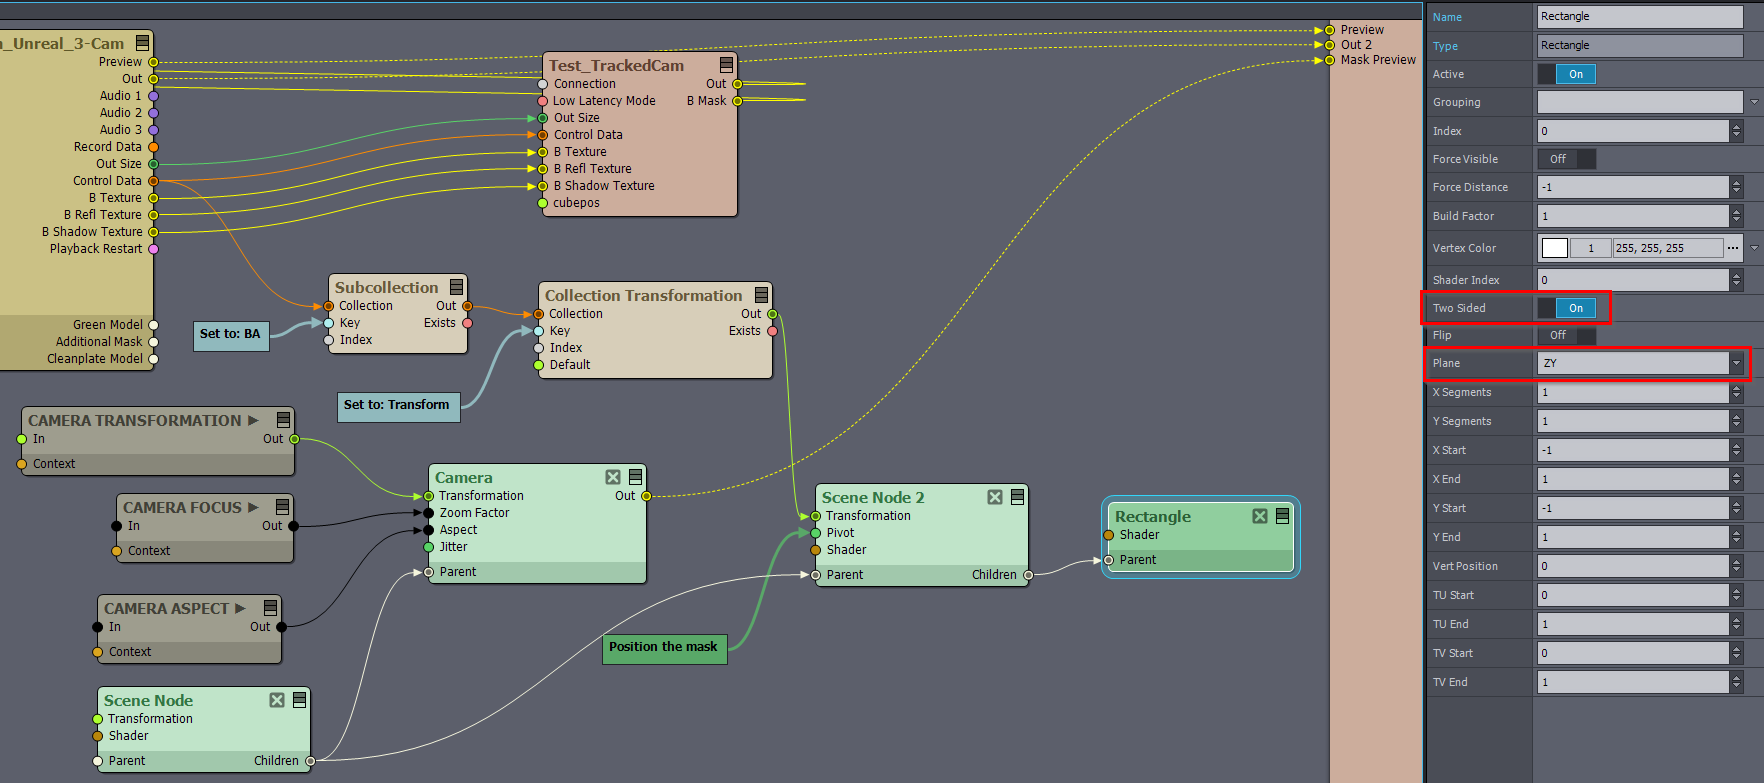 I suggest putting the rectangle to Two Sided and ZY plane so it would be under the billboard. You can position it using the Scene Node's pivot.
You could just copy the mask (rectangle) transformation from Unreal into Aximmetry. You can convert the Unreal Coord system into Aximmetry like it is explained here: https://my.aximmetry.com/post/2982-unreal-virtual-camera-in-aximmetry (in the next release there will be actually a compound to make this conversion easier)If you want to actually render a mask in Unreal, that will be quite cumbersome if you don't want that mask to be in the final picture. You probably could only do it with a render texture in Unreal and that would be quite resource extensive. Instead, you should just use an additional camera in Aximmetry.
Here I have some tips on how to create masks in my comment: https://my.aximmetry.com/post/1796-how-to-mask-out-an-effect
I am not exactly sure what is your aim with the mask. If you can write a bit more about that, then I can probably write more.Just to give some ideas, what is possible and I could write more about:
You could use the B Mask pin of the Unreal node to cut out the occluding objects of your billboard from your mask.
You can open the camera compound and have more than one keyer, as you suggested, and you could even do this in real-time under production.
You could detect if your billboard is within the mask's area and apply different effects according to this.
Warmest regards,