Hi there,
i`m pretty new to all this stuff with Aximmetry and i wanted to use it for livestreams. I saw that you can use different scenes/levels inside of one Unreal project and switch between scenes in Aximmetry. I tried the level streaming blueprint from this video: https://www.youtube.com/watch?v=GdVyKynbwxo but i instantly gives me error message inside the blueprint. I also dont need any effects for transition etc. just a simple way to switch between as many scenes / levels inside of Aximmetry with buttons/trigger.
Is there someone that can help me and maybe make a blueprint with tutorial for me. I would pay for that for sure.
Best Regards,
Sebastian
Hi Sebastian,
To create the simplest level switch, you should use the Open Level blueprint node instead of level streaming.
The Open Level node does not support seamless transitions, meaning the picture will be frozen while the computer loads the level.
This node completely replaces the current level with a new one, so all blueprint logic must be present in each level to facilitate switching. Therefore, it is recommended to create an Actor Blueprint class instead of using the Level Blueprint. This Actor Blueprint can be easily dragged and dropped into each level.
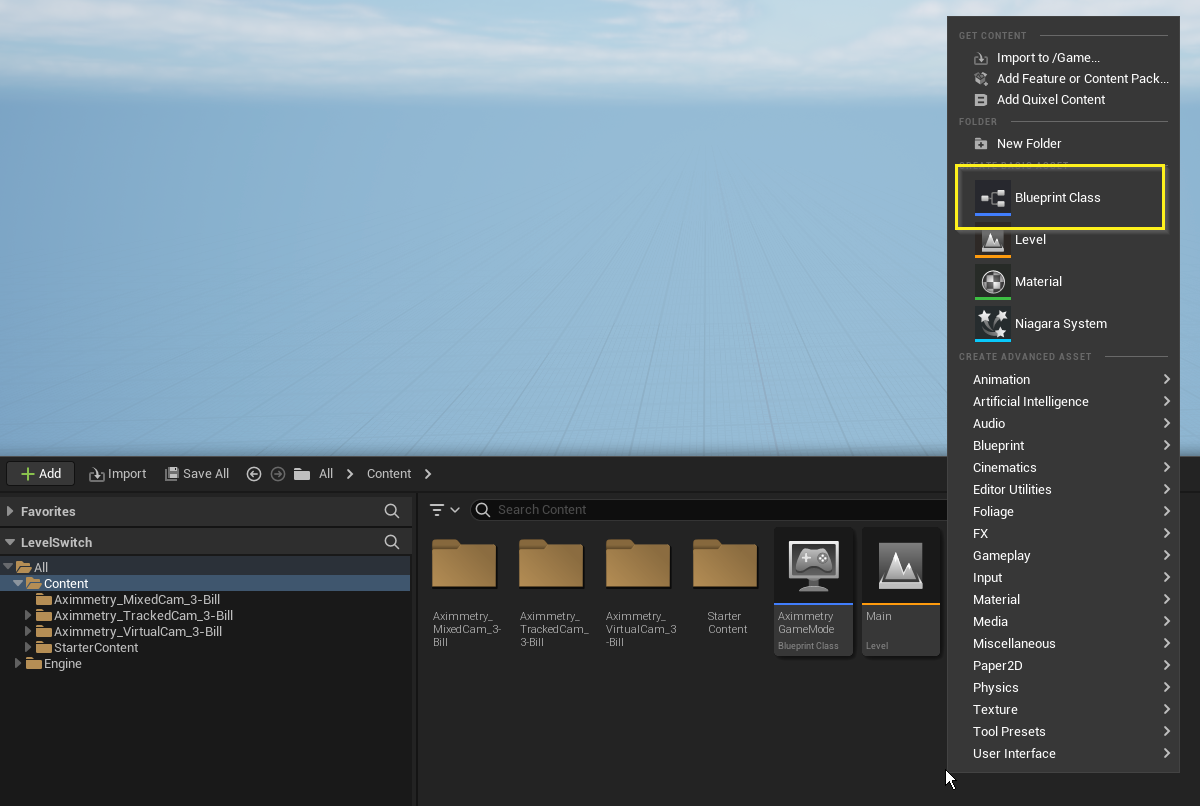
To do this, open Unreal's Content Browser, right-click, and select the Blueprint Class option:
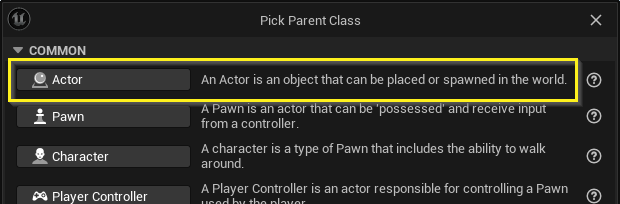
Choose Actor Parent Class:
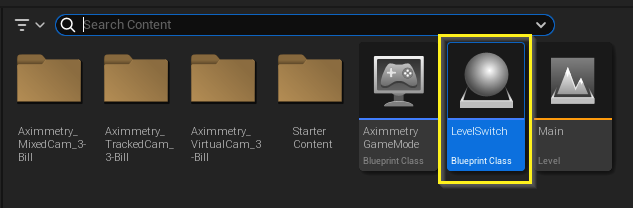
Name the created file, for example, "LevelSwitch", and double-click it to open:
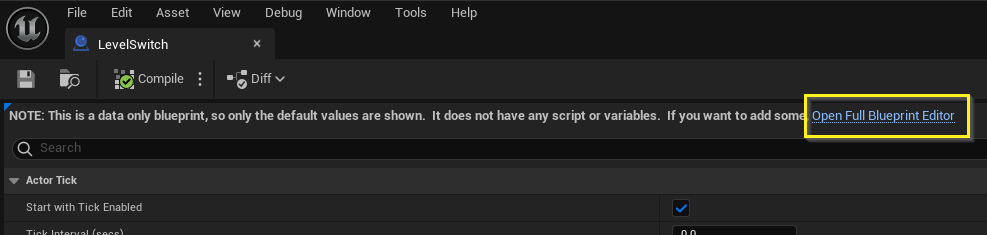
Click on Open Full Blueprint Editor text if the following message appears in the new window:
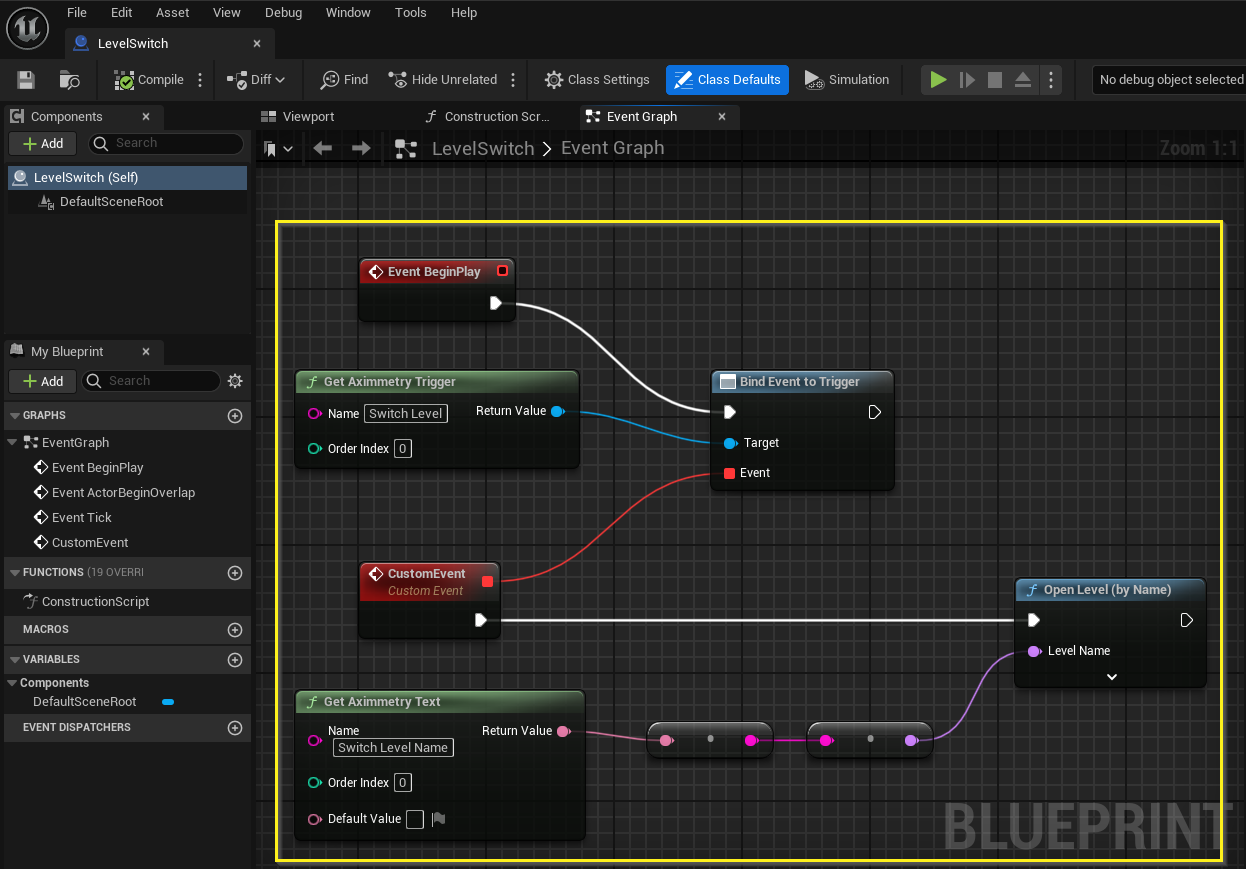
Right-click in the Event Graph and Add and connect the following nodes: Get Aximmetry Trigger, Get Aximmetry Text, Event BeginPlay, CustomEvent, Bind Event to Trigger, String to Name, and Open Level (by name).
Note, the Context Sensitive search must be turned off to find the Bind Event to Trigger node: https://aximmetry.com/learn/virtual-production-workflow/preparation-of-the-production-environment-phase-i/obtaining-graphics-and-virtual-assets/creating-content/creating-content-for-aximmetry-de/additional-control-with-blueprints/#context-sensitive
When connecting the Get Aximmetry Text to the String to Name node, Unreal will automatically create a node to convert the data from text to string.
You can also copy these blueprint nodes from here: https://blueprintue.com/blueprint/c9_yehtc/
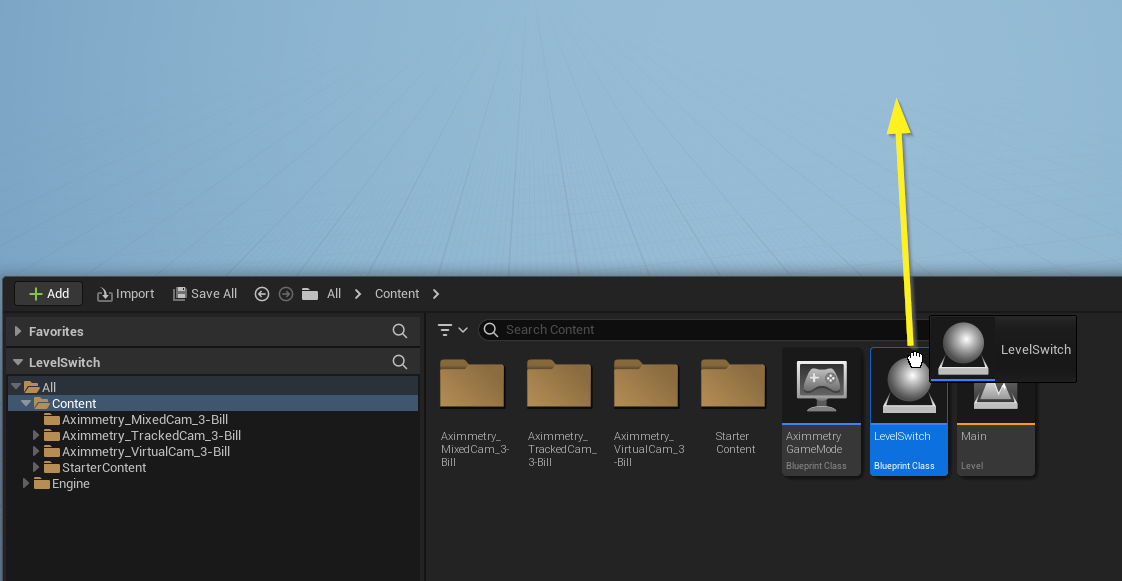
The blueprint must be added to all levels. To do this, open each level one by one and drag the blueprint from the Content Drawer into the Viewport:
")
")
Make sure that the same Aximmetry camera has been added to each level:
In Aximmetry, you will see two new pins. The trigger pin (named "Switch Level" in the example blueprint) starts loading the level, and the text pin ("Switch Level Name") specifies which level to load:
You can specify the level's name without any path, but this will increase load time as Unreal has to search through all the files in the project.
")

To avoid this, right-click on the desired level's file, and select Reference Viewer...:
From there you can copy the reference of the level as shown here:
If not all levels have the same Get... Aximmetry nodes in blueprints, then you must ensure that in the Project Settings, the Editor Startup Map and Game Default Map contain all the Get... Aximmetry nodes that will be used in other levels, including matching their name parameters.

This is because this first level is being used by Aximmetry to populate the pins on the unreal module in the Flow Editor.
Warmest regards,