Can the host be added with an entrance or disslove effect?


I am the beginner for aximmetry and i want to get this effect,

https://www.youtube.com/watch?v=u_YHk68xpkc&list=PLlOk0Z3CkqH7c3FFDkY-nz5MxyntxGANC&index=2&t=279s.

I could use dynamic material for actor in UE5,but i found in aximmetry ,the billboard is separate from the scene,how can i effect it ?

By the way ,is there any document about the usage of module?

Thank you 
   loseisbest

 
Profile Image
Eifert@Aximmetry
  -  

Hi,

There is no documentation on the Aximmetry camera in Unreal and its blueprint. You could edit the Aximmetry camera's blueprint and add the things from the youtube video. But we don't recommend editing the blueprint as that would make it hard for you to update Aximmetry afterward.
Instead, it would be best if you did it in Aximmetry. Since Aximmetry sends the billboard to Unreal, it is fairly easy to apply any effects on the billboard's picture in Aximmetry.

For example, you can make this effect in Aximmetry on the billboard:
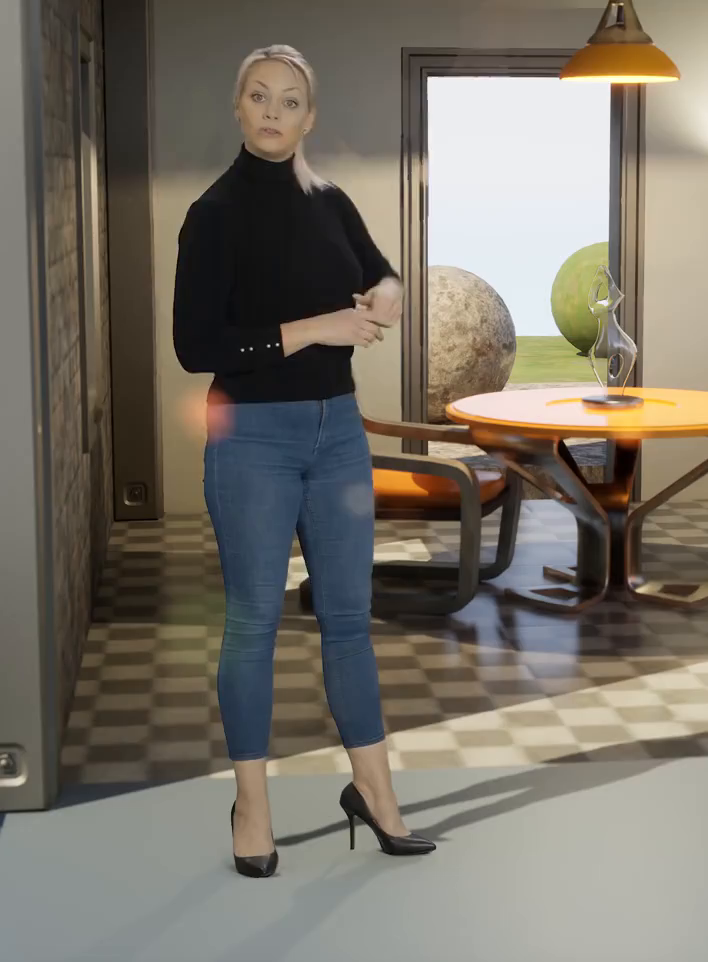

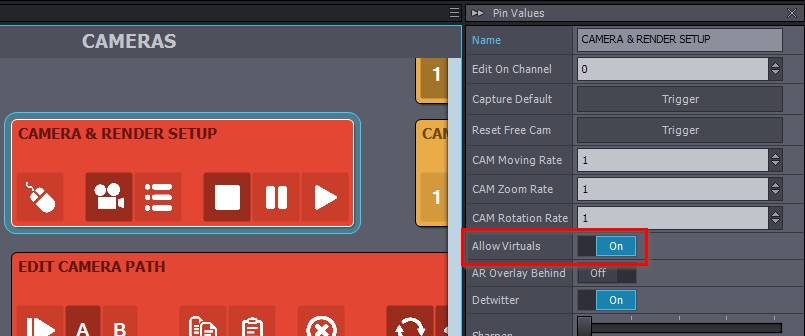
To do so, first, make sure you use Allow Virtuals.
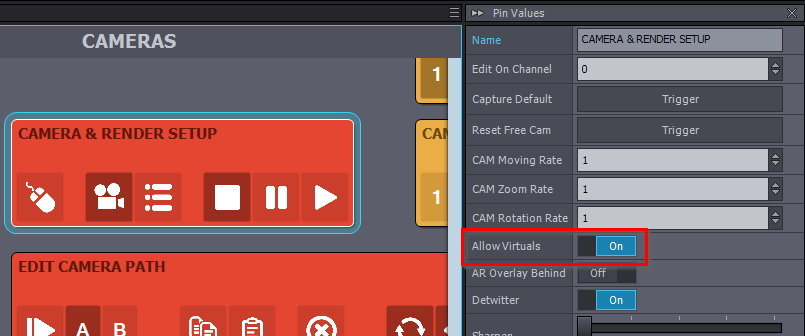
If you don't want to use Allow Virtuals, you will have to edit the camera compound. If you want that I can describe how to do it.

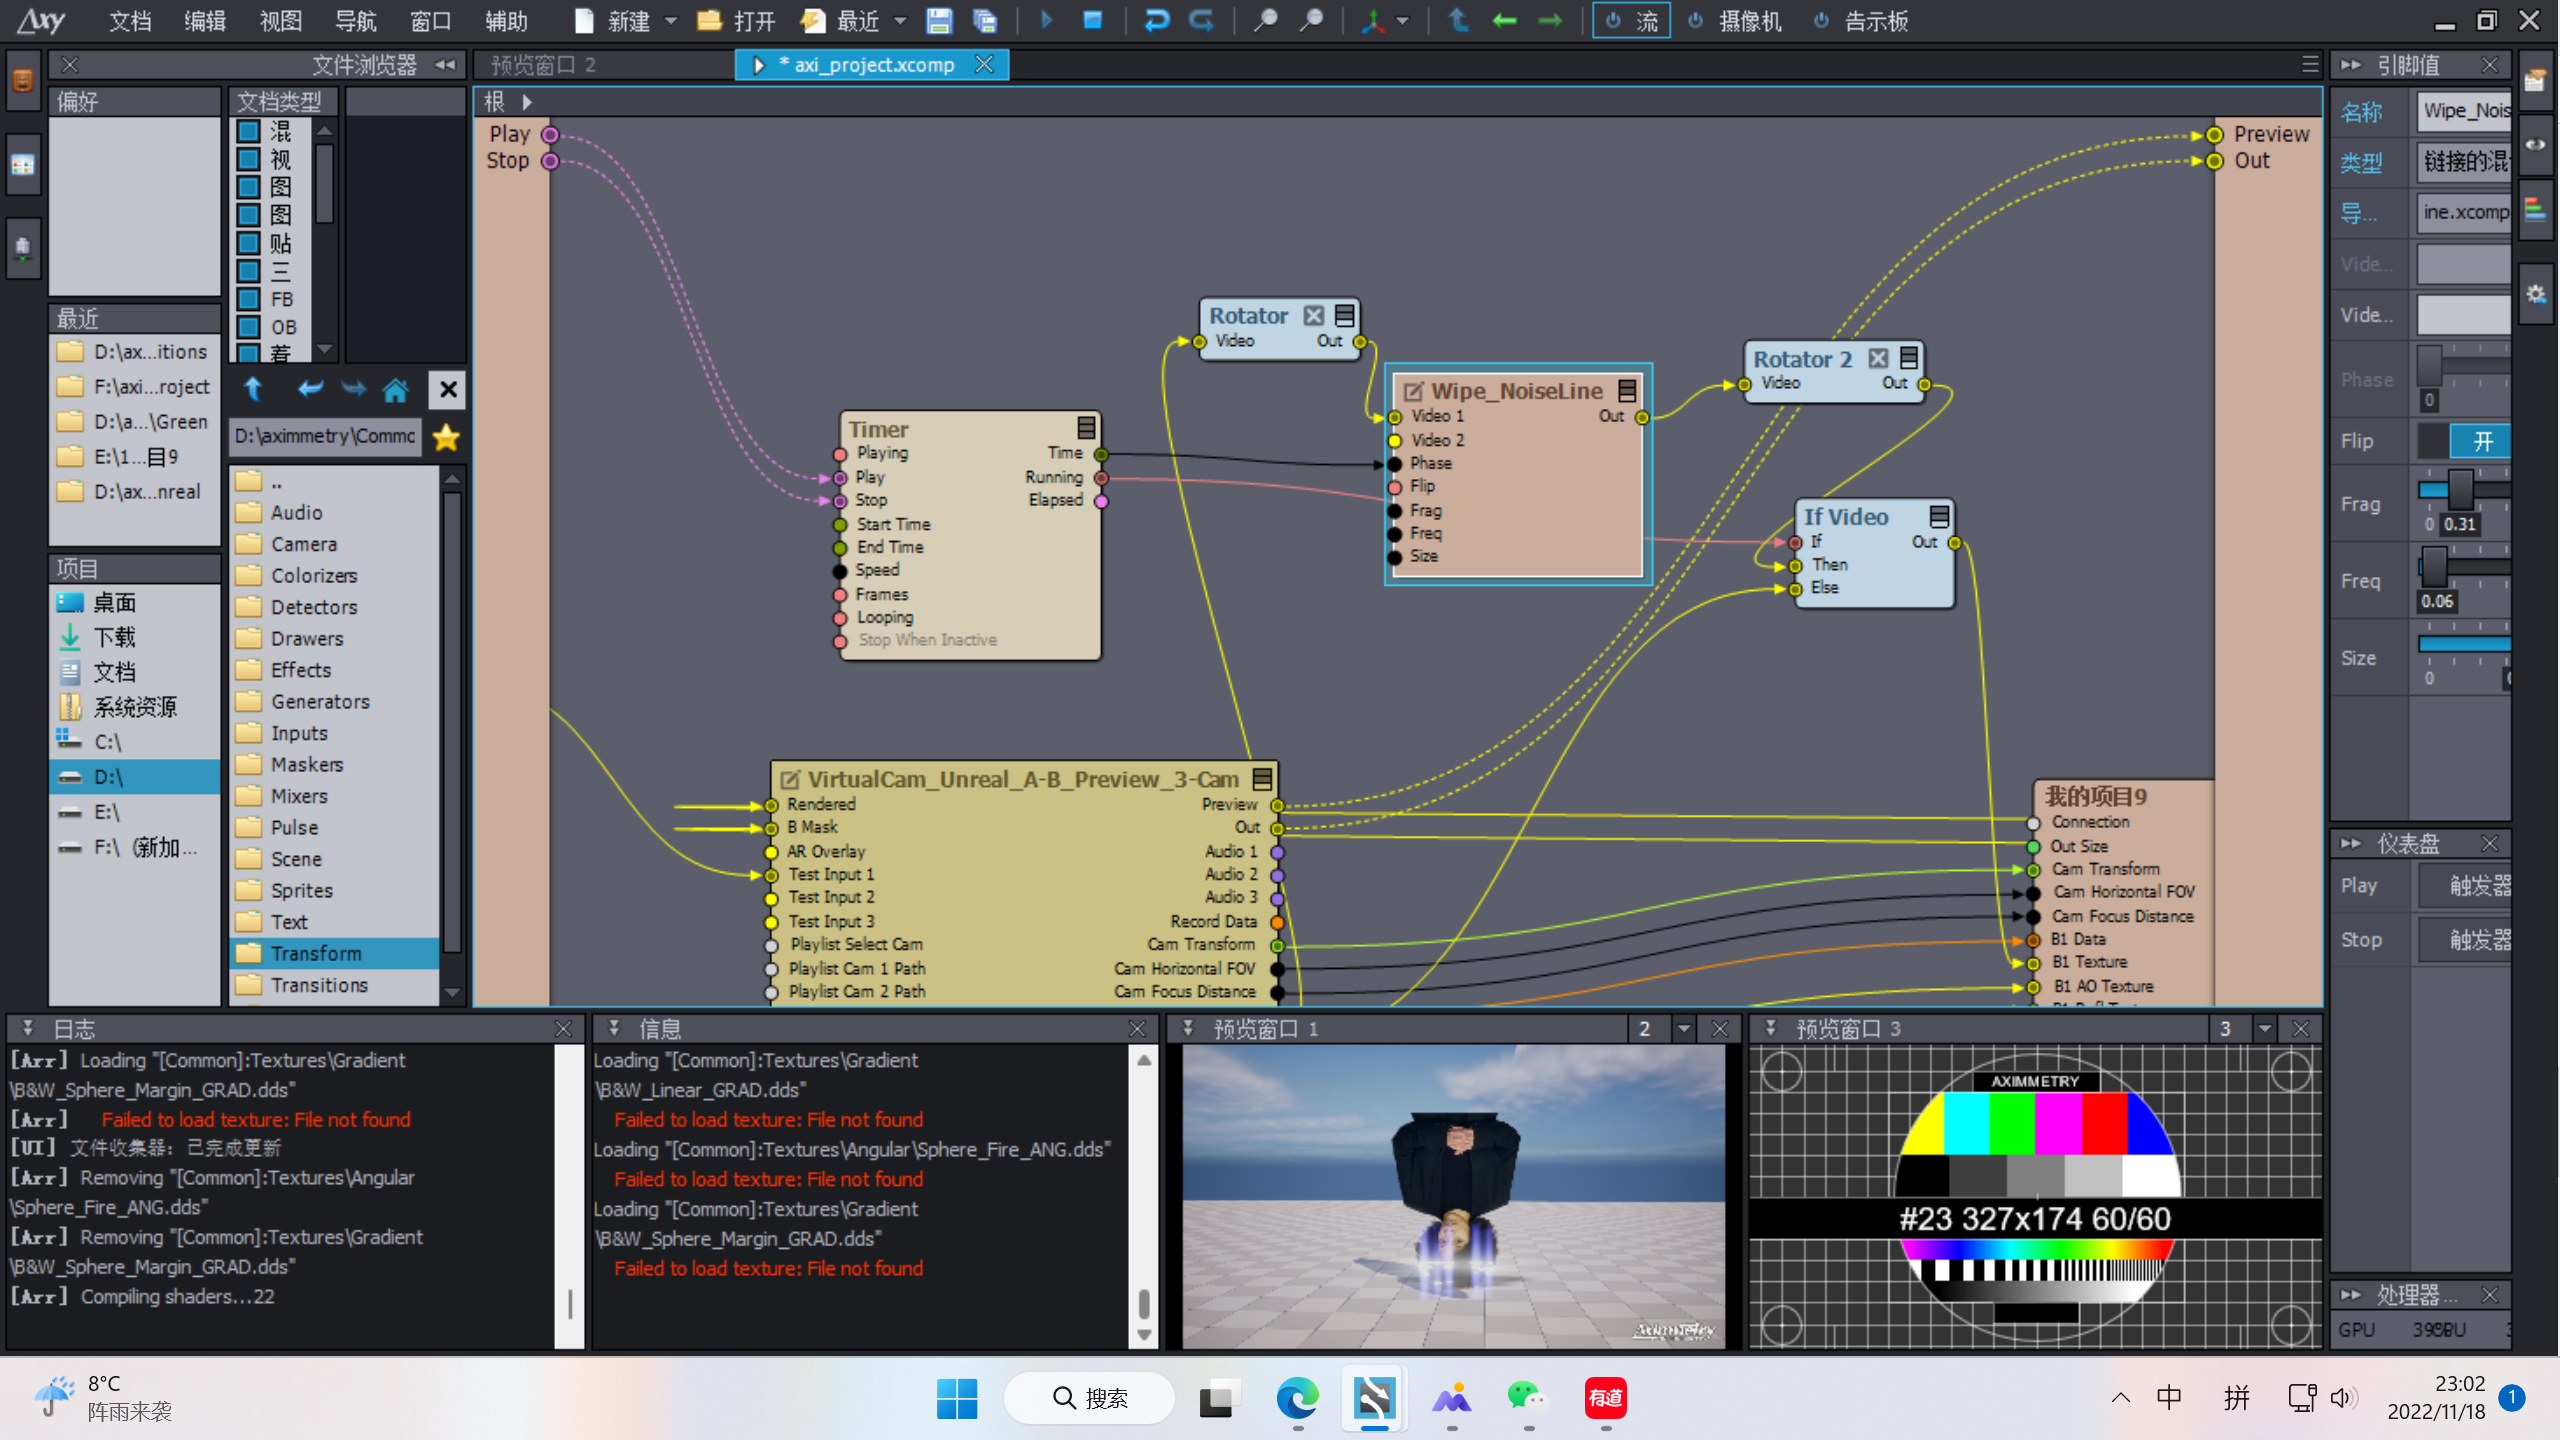
Then you can do the following setup, where we use the [Common]:Compounds\Transitions\Wipe_NoiseLine.xcomp for the actual dissolve effect. Note that there are various other effects that you could use on the billboard in the [Common]:Compounds\Transitions\ folder.
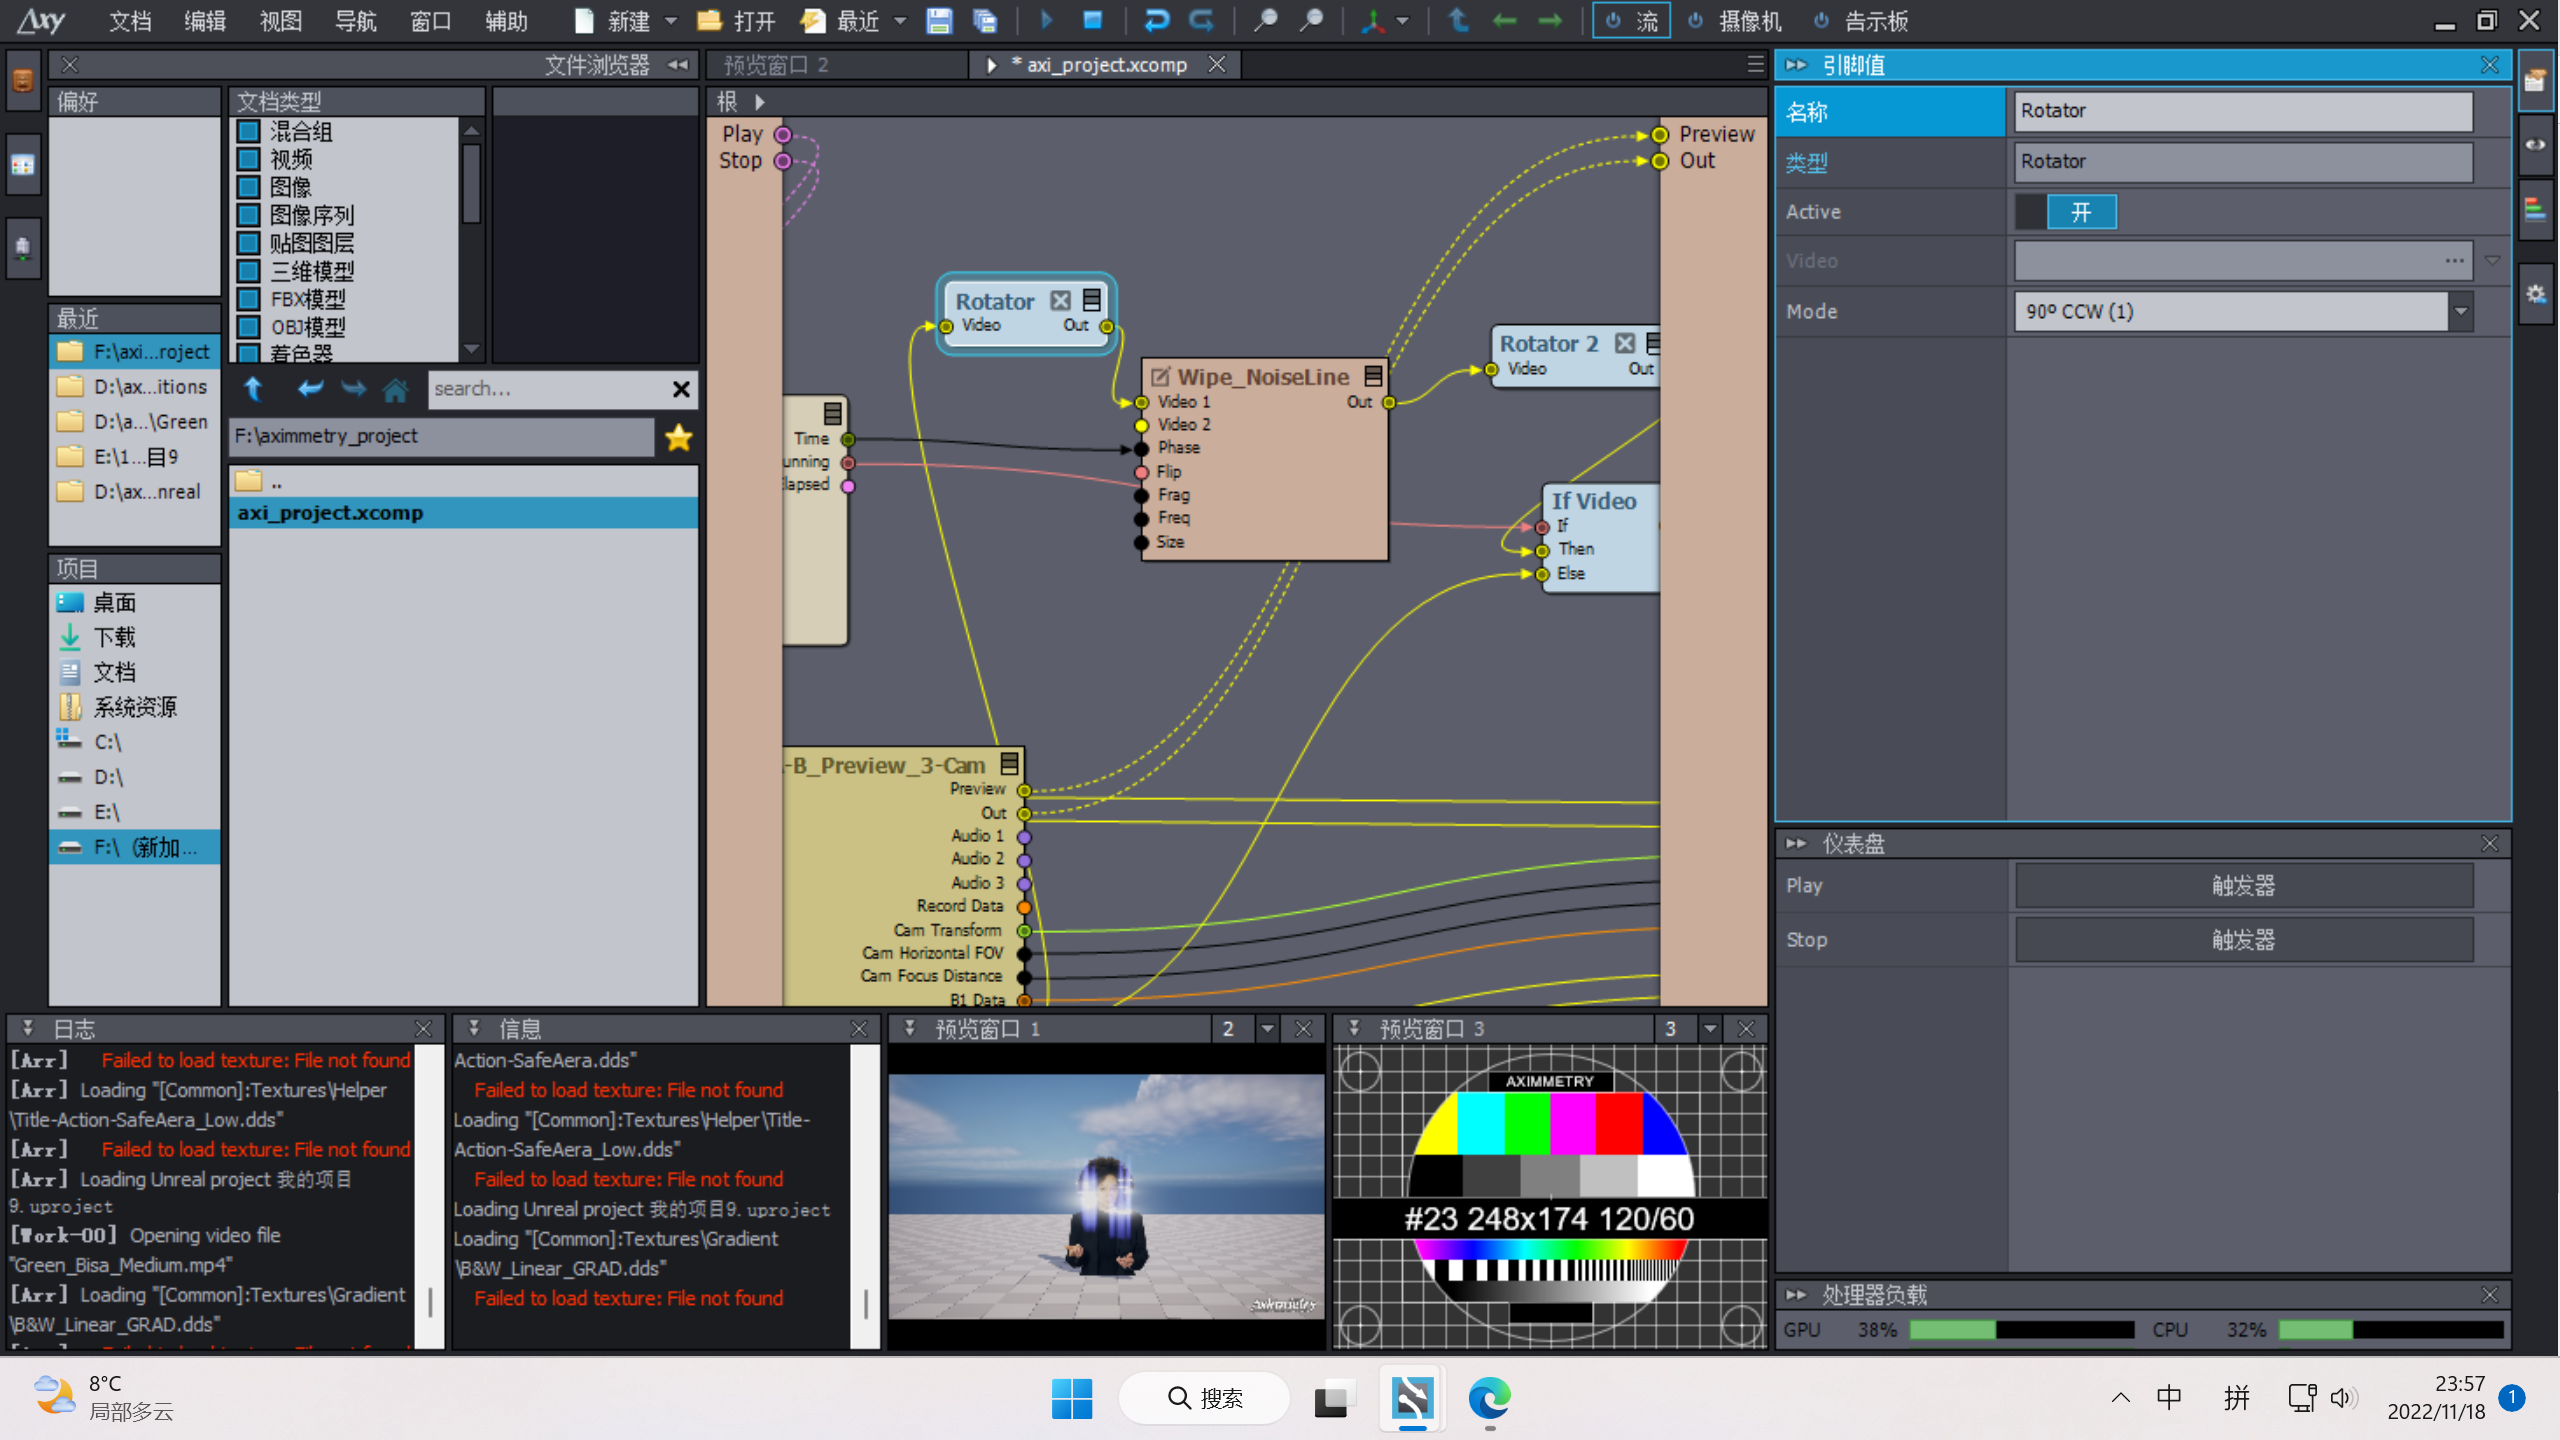
The Rotator modules have been added so that the effect goes from bottom to top. Set the rotation mode to 90° CCW in the first Rotator module.
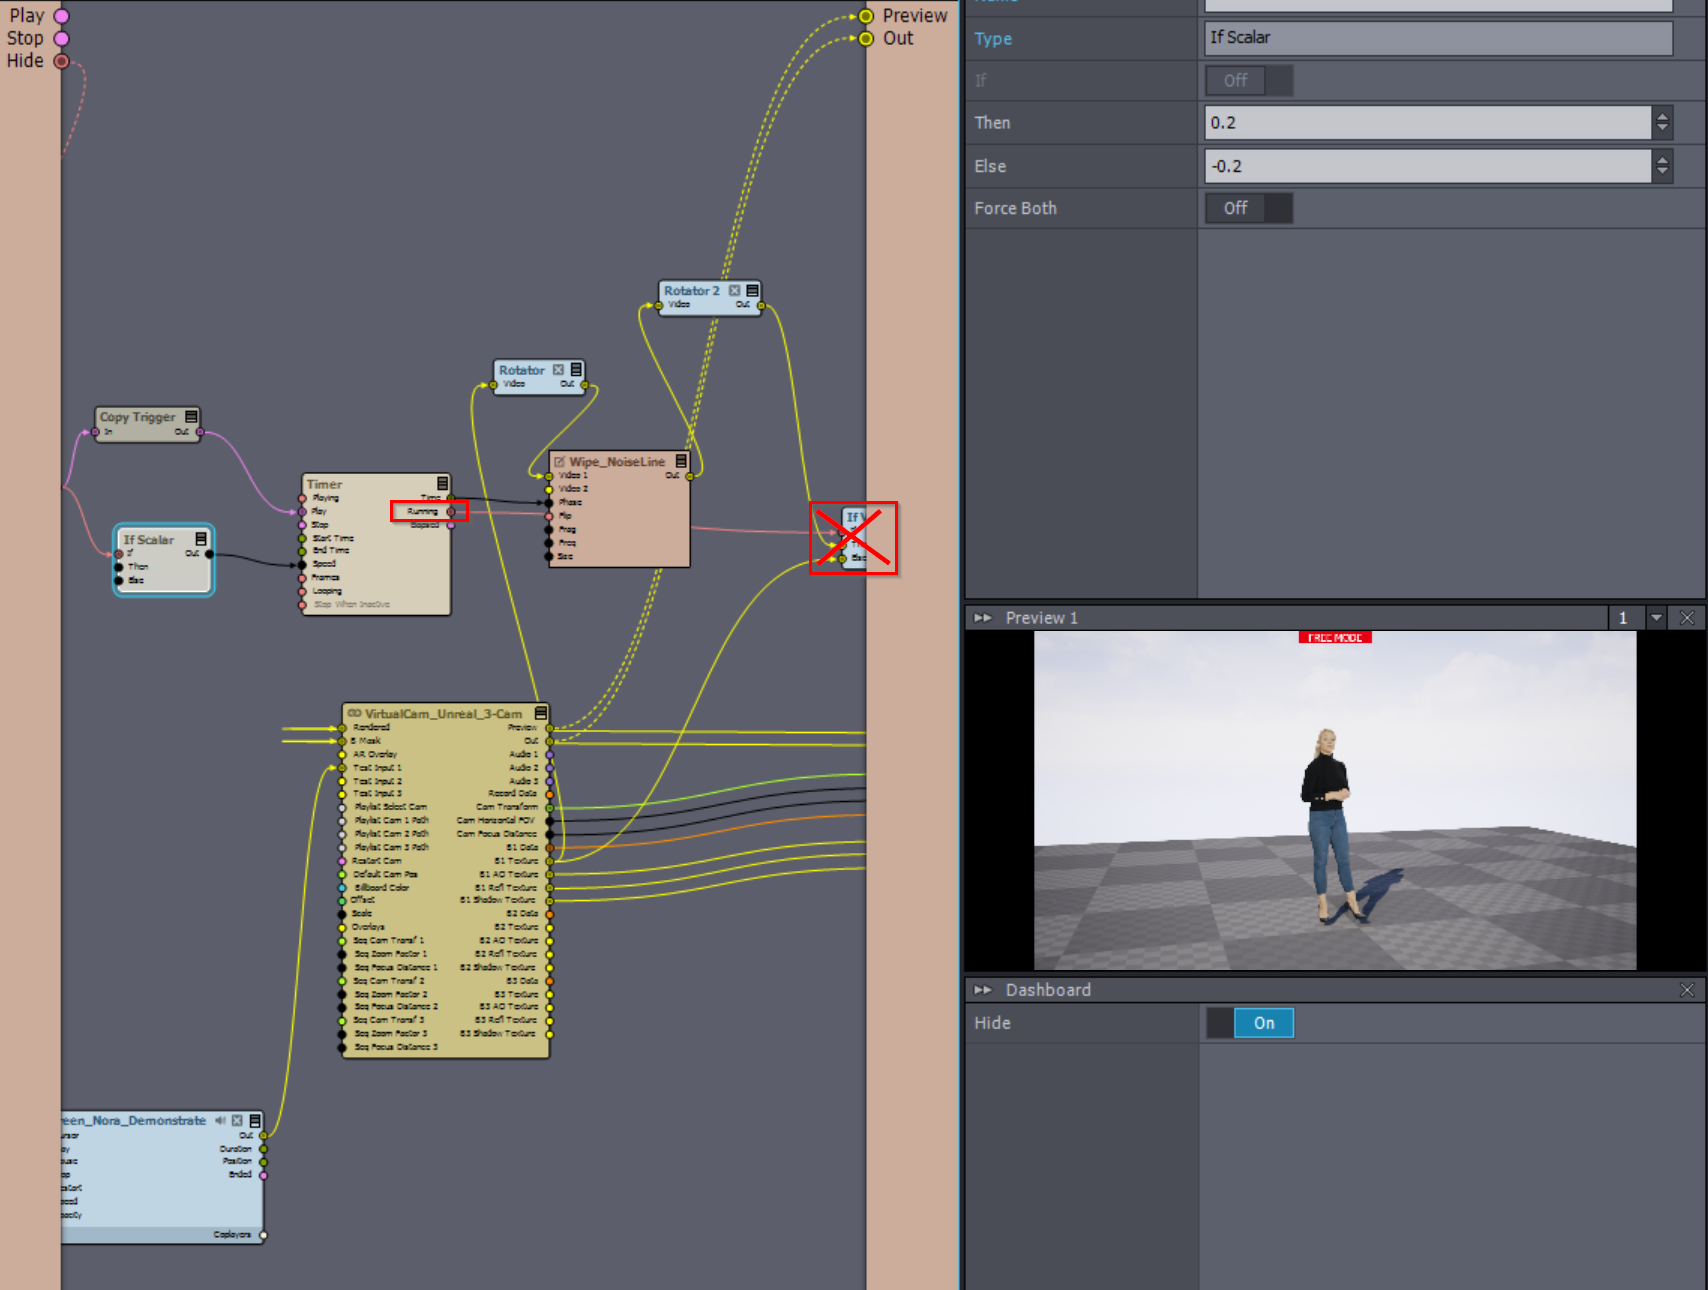
The If module has been added so that the effect only consumes resources while it is active.
And the Timer module has been added to control the effect. You probably want to change the Timer's Speed and End Time pins.
Depending on what kind of reflection and shadows you use, you might need to do the same connections and nodes on the B1 Refl/Shadow/AO textures.

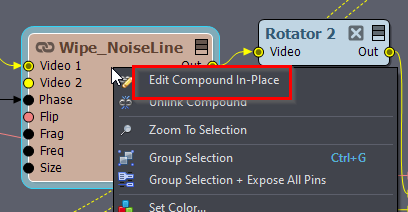
After this, you should already see the effect on the billboard. But there are some issues, so let's edit the Wipe_NoiseLine compound a little bit. Right-click on the compound and select Edit Compound In-Place:
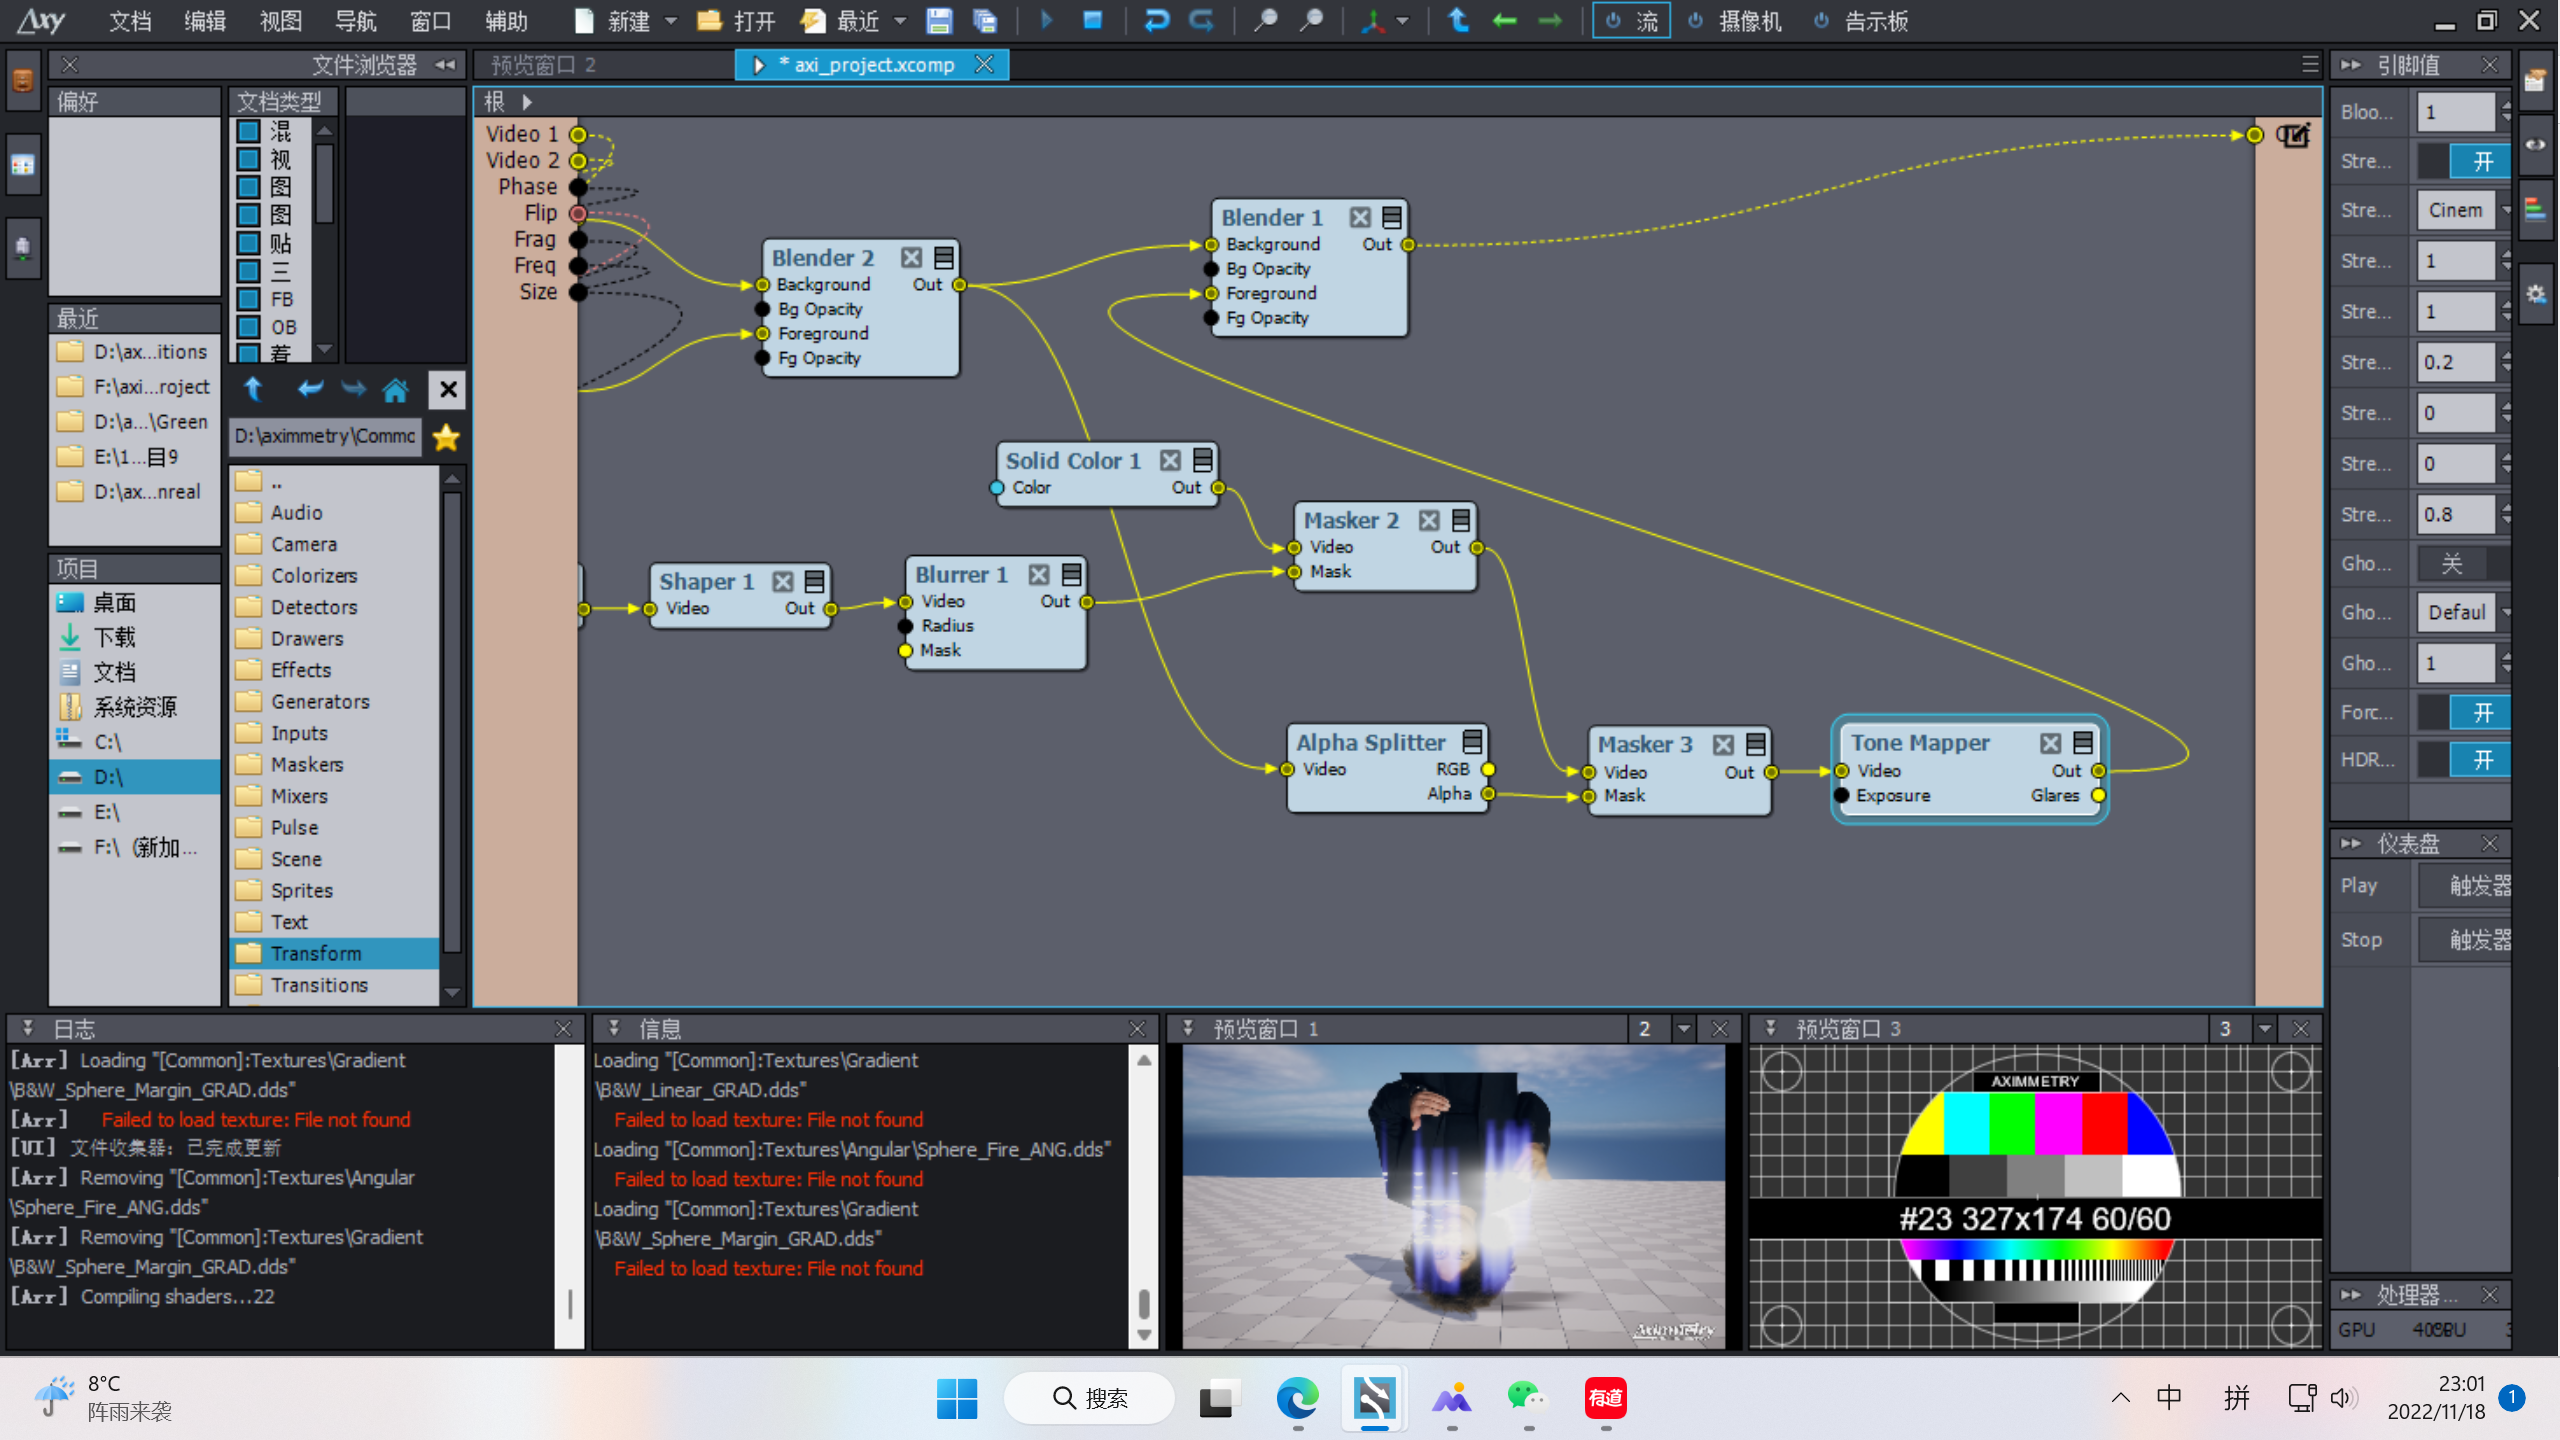
Inside, change the Solid Color module's color pin to any color you want the effect to be.
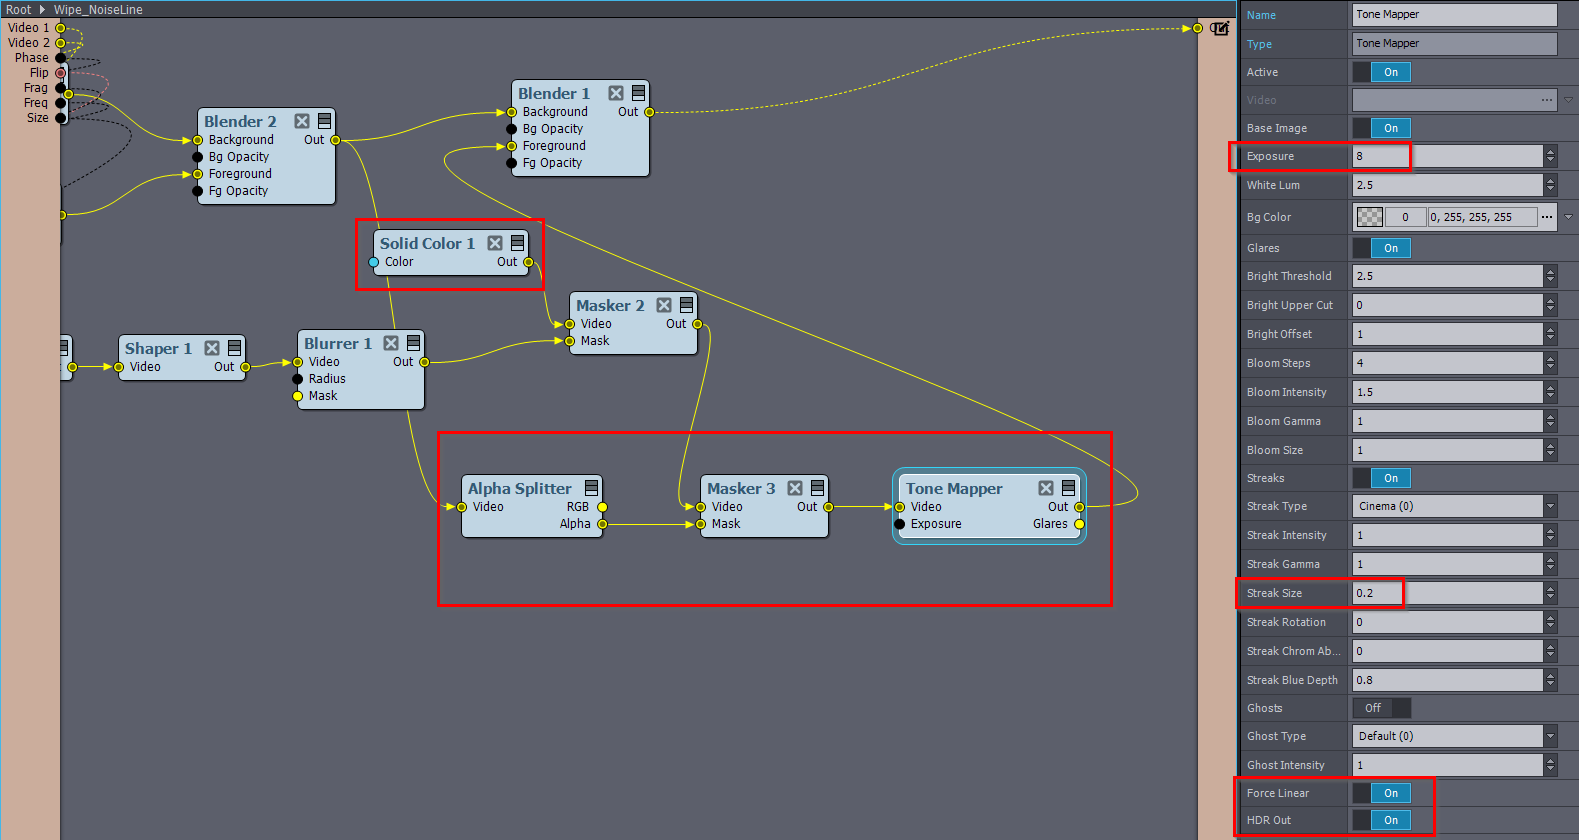
And add the Alpha Splitter and Masker modules as below. These will mask out the effect, so it will be only visible over the actual billboard.
And add a Tone Mapper module with the pin values as below. The Tone Mapper makes the dissolve effect much nicer:
You can also change the Shaper module's amount to make the dissolving line thicker. Or change any other module. You can always peek at the connection to see how things are by holding down the CTRL and moving the mouse over the connection.

Note, you can even make your own dissolve shader in Aximmetry and use that on the billboard with Custom Processor module:

Most likely, this would be more resource efficient.

Warmest regards,

 
Profile Image
loseisbest
  -  

I tried your method, but there seems to be a problem. When I press the trigger, the character rotates 180 degrees, and the light passes over the character


Profile Image
loseisbest
  -  


Profile Image
Eifert@Aximmetry
  -  

Hi,

I forgot to mention that you need to set the rotation Mode to CCW in the first Rotator module:

Warmest regards,

 
Profile Image
loseisbest
  -  

Thank you for your answer but the problem has not been solved the light is from the human surface


Profile Image
Eifert@Aximmetry
  -  

Hi,

It is hard to tell what is going wrong.

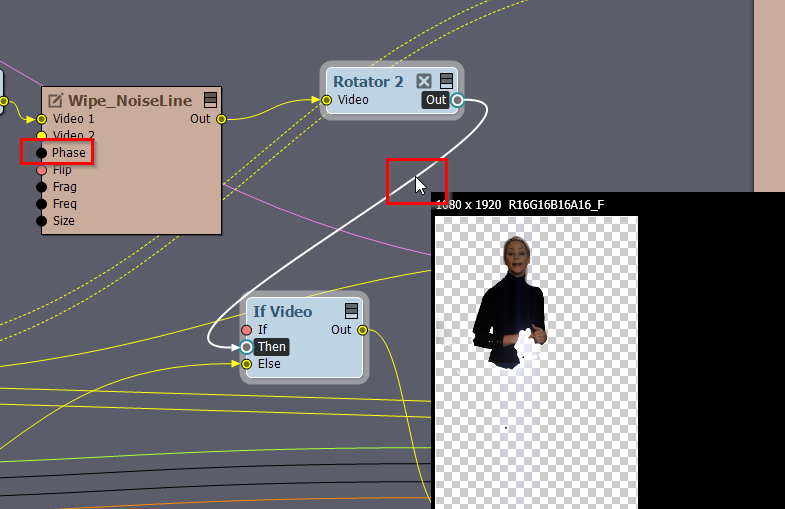
You can check if your billboard gets masked after the Wipe_NoiseLine compound by peeking on the connection (hold down the CTRL and moving the mouse over the connection):

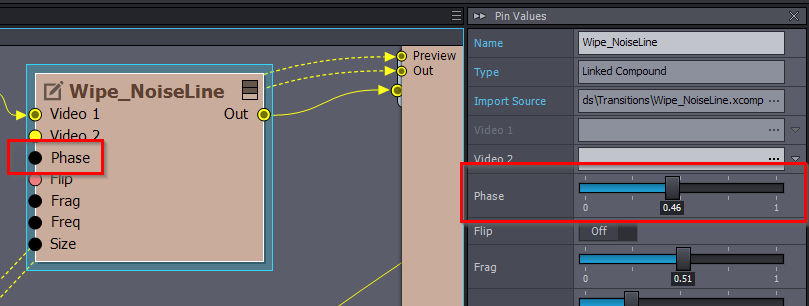
Also, you can disconnect the Timer from the Wipe_NoiseLine compound and set a phase's position yourself:

And make sure that Allow Virtuals is turned on:

Warmest regards,

 
Profile Image
loseisbest
  -  

I used the method you taught me to find the error, the missing material path, now it is successful, but I want the character to be hidden at the beginning and come out when I press the trigger

 
Profile Image
Eifert@Aximmetry
  -  

Hi,

By counting backward in the Timer module, you can change the character to be hidden. You do this by changing the Timer module's Speed to negative. Don't forget to set an End Time in the Timer module, otherwise, it will count forever.

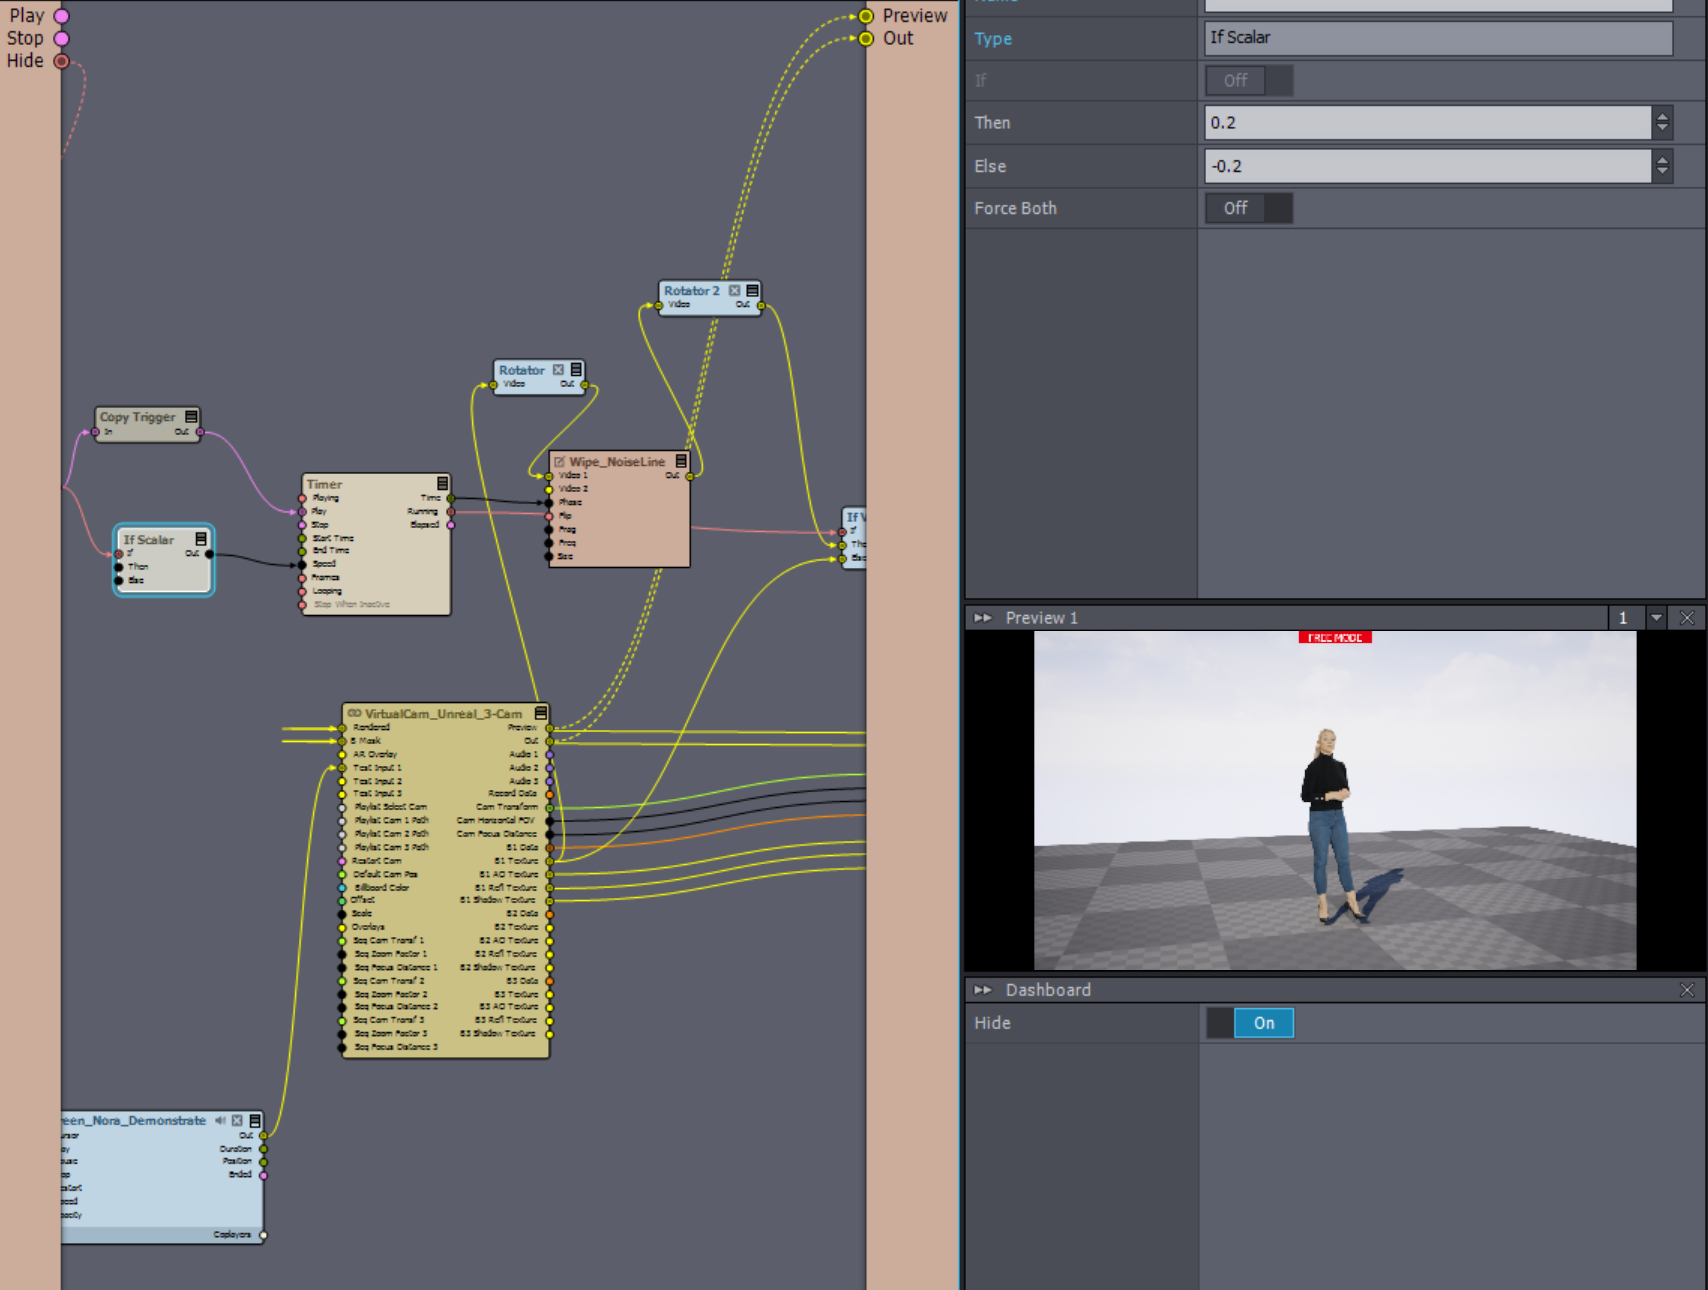
You might want a setup like this. Where the Hide dashboard pin switches between hidden billboard and visible billboard state.
In the If Scalar module, you have to set the transition in (Then) and out (Else) speeds for the Timer:

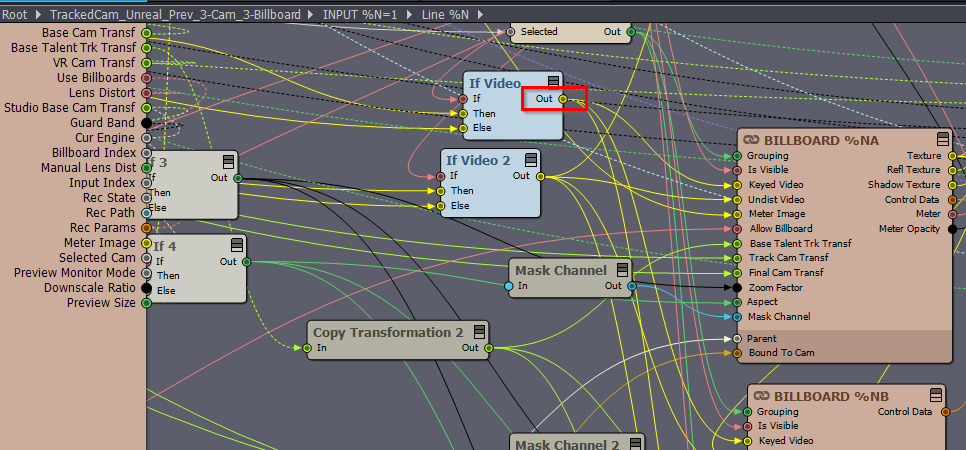
I removed the If Video module after the dissolve effect. It turns out the dissolve effect won't consume many resources when it is not running.

Warmest regards,

 
Profile Image
loseisbest
  -  

Thank you soooooo much!

 
Profile Image
EmilPohjalainen
  -  

Cool transition!

Eifert, you said:

"If you don't want to use Allow Virtuals, you will have to edit the camera compound. If you want that I can describe how to do it." 

Would you still like to describe how to do it that way? I would love to try it out! 


Profile Image
Eifert@Aximmetry
  -  

Hi,

First, I would suggest you set it up with Allow Virtuals.

Then you can switch to turn off Allow Virtuals and you can edit the camera compound like this:

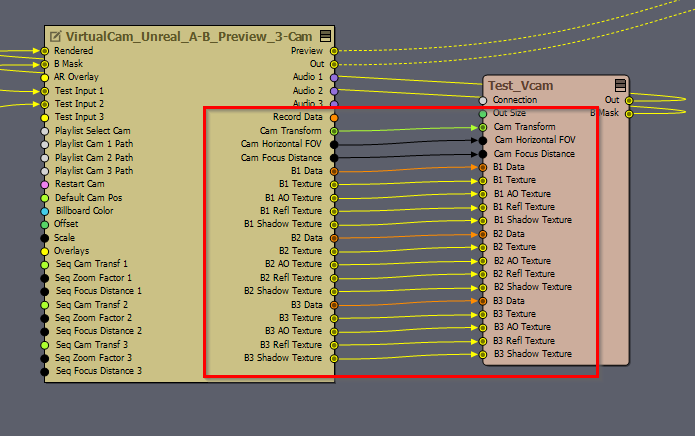
First, detach the dissolve's logic between the camera compound and the Unreal node.
Add a Transmit Video module at the end with the Into Tunnel pin named DissolveIn (this name is arbitrary):

Then select edit the camera compound In-Place on the camera compound:

Then enter the camera compound by double-clicking on it.

Then, inside the camera compound find the Input compound, and enable Edit Compound In-Place on them:

Then enter the camera compound by double-clicking on it.

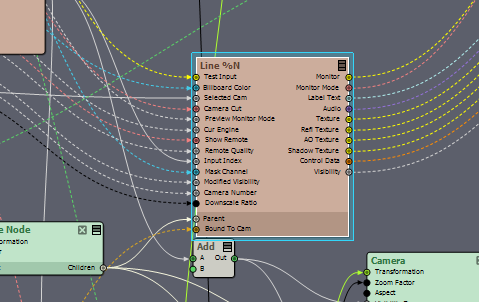
Find the Line compound and enter it:

Inside find the Billboard compound and add the following logic before the Keyed Video pin:
Add two Transmit Video modules. The one connected to the Keyed Video pin should have its From Tunnel pin selected DissolveIn, the name we used previously outside of the compound. The other Transmit Video module should have its Into Tunnel pin named DissolveOut (this will be sending the video out to the dissolve logic).

Go back to dissolve logic and add another Transmit Video module with From Tunnel pin selected DissolveOut:

Then, make sure you have everything connected as it should be between Unreal and the camera compound:

And the dissolve effect should now work for the first billboard.

Note, you shouldn't save in place a camera compound. You should probably read our documentation on compounds here: https://aximmetry.com/learn/virtual-production-workflow/preparation-of-the-production-environment-phase-i/scripting-in-aximmetry/flow-editor/compound/


If you are using the tracked camera, then you go to the same place inside the camera compound as above. But you will be placing the Transmit modules here:

While the transmit module with DissolveIn should be connected to all 3 billboard compounds.


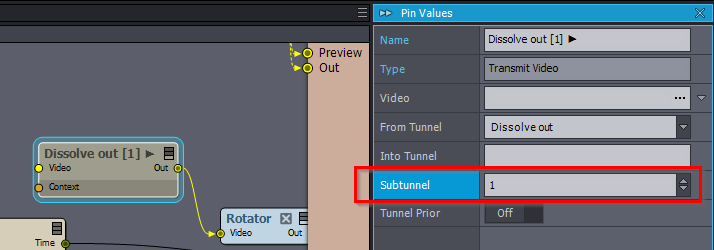
You can easily multiply the above logic for the other camera inputs. You just need to duplicate the dissolve logic for each camera, edit the relevant camera input in the camera compound with the transmit modules (there is an Input compound inside the camera for each input), and have all the new Transmit modules with the same new Subtunnel number per input:

Warmest regards,

 
Profile Image
huseen
  -  

This lesson is very special

Where can I find such lessons?

Thanks Eifert@Aximmetry

 
Profile Image
Eifert@Aximmetry
  -  

Hi Huseen,

There are some lessons like this on the forum.

And there are similar but more basic lessons here: https://aximmetry.com/learn/virtual-production-workflow/preparation-of-the-production-environment-phase-i/obtaining-graphics-and-virtual-assets/creating-content/creating-content-in-aximmetry-se/introduction/ 

And here: https://aximmetry.com/learn/virtual-production-workflow/preparation-of-the-production-environment-phase-i/scripting-in-aximmetry/introduction-to-scripting-in-aximmetry/ 

In the future, you can expect that the above two locations in the documentation will get more complex and specific lessons similar to the one this post has.

Also, the packages and libraries that come with Aximmetry have many compounds that can provide examples. The Tutorials library package has some complex ones.

And if you have some specific one in your mind and you don't find anything similar, then we are happy to help you here in the forum. Maybe it will function as the base for future documentation.

Warmest regards,

;