Hi, I want to get myself into my project with a green screen. I got lighting sequences where I want to be mapped behind but if I play the sequence the input of my camera live footage is in front of the lights
Green Screen
コメント
Tornado
-
I´ve done it like it is in the document from the answer. Now I got as you can see DMX Moving heads, lighting... that are still infront. If I search for the Render CustomDepth Pass I cant find it. Do I have to do it with the translucent instructions? And if so where can I find the material to change it because there ist no material in the details pannel?


Eifert@Aximmetry
-
Hi,
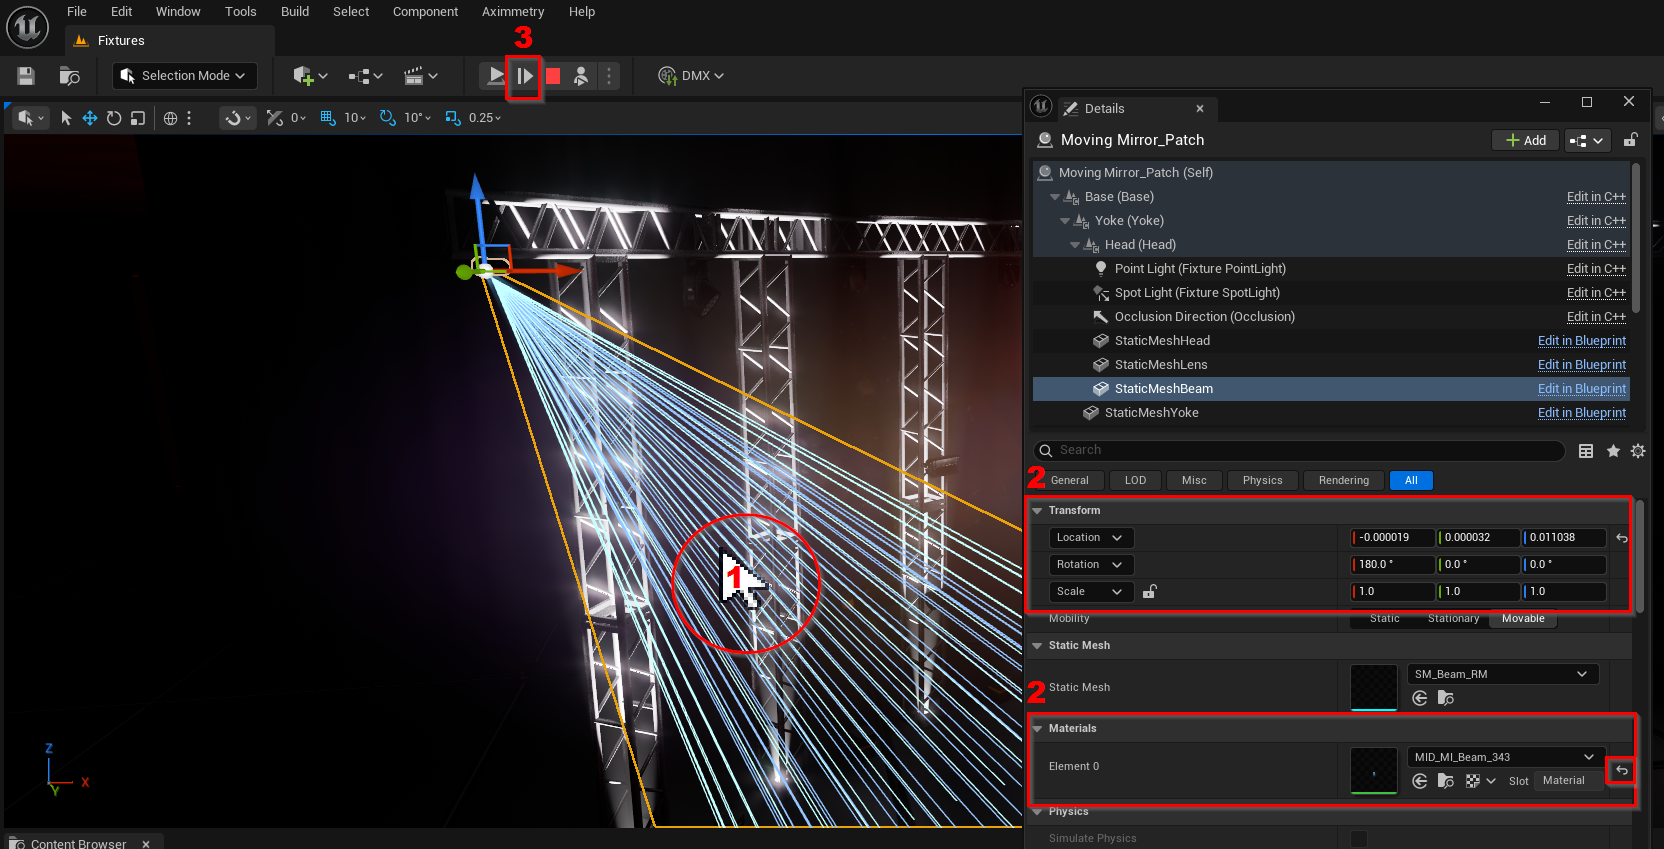
In your case, there will almost certainly be a subcomponent on the Actor that functions as the beam, using a translucent material.
To resolve this, you need to find the right subcomponent in the details panel, then open its material and set the material's Translucency → Advanced → Allow Custom Depth Writes to On.
For example, here I needed to select the StaticMeshBeam subcomponent to access and modify its material:
Since these assets are often dynamic and may be created at runtime in specific locations, they can be more challenging to find then the above case.
Also, this is returning issue, so I will try to detail here a workflow that will work in almost all similar situations:
- Start the scene. You do not need to be in Live Sync mode, although it can help.
- Use the Simulate Camera feature to easily navigate to the location where the object (such as the beam) will appear.
- When the object becomes visible, Pause the scene.

For more details on Live Sync and Simulate Camera, you can refer to Aximmetry’s documentation: https://aximmetry.com/learn/virtual-production-workflow/obtaining-graphics-and-virtual-assets/creating-content-in-unreal-editor/interactive-editing-with-live-sync/
Once the object is visible:
- Click on it in the viewport to select it. Then, double-click at the same location to select the relevant subcomponent.
- To confirm you have selected the correct component, try changing its position or material. You can always revert these changes once you're ready to work on the original material.
- Sometimes, changes do not apply immediately because the engine needs one frame to update. You can advance a single frame using the single-frame advance button to observe your changes on the correct object.
In some cases, you may not see a standard material but encounter a complex blueprint or a system that generates the object and its material dynamically. The most common example is a Niagara particle system. For such systems:
Open the relevant Niagara System asset: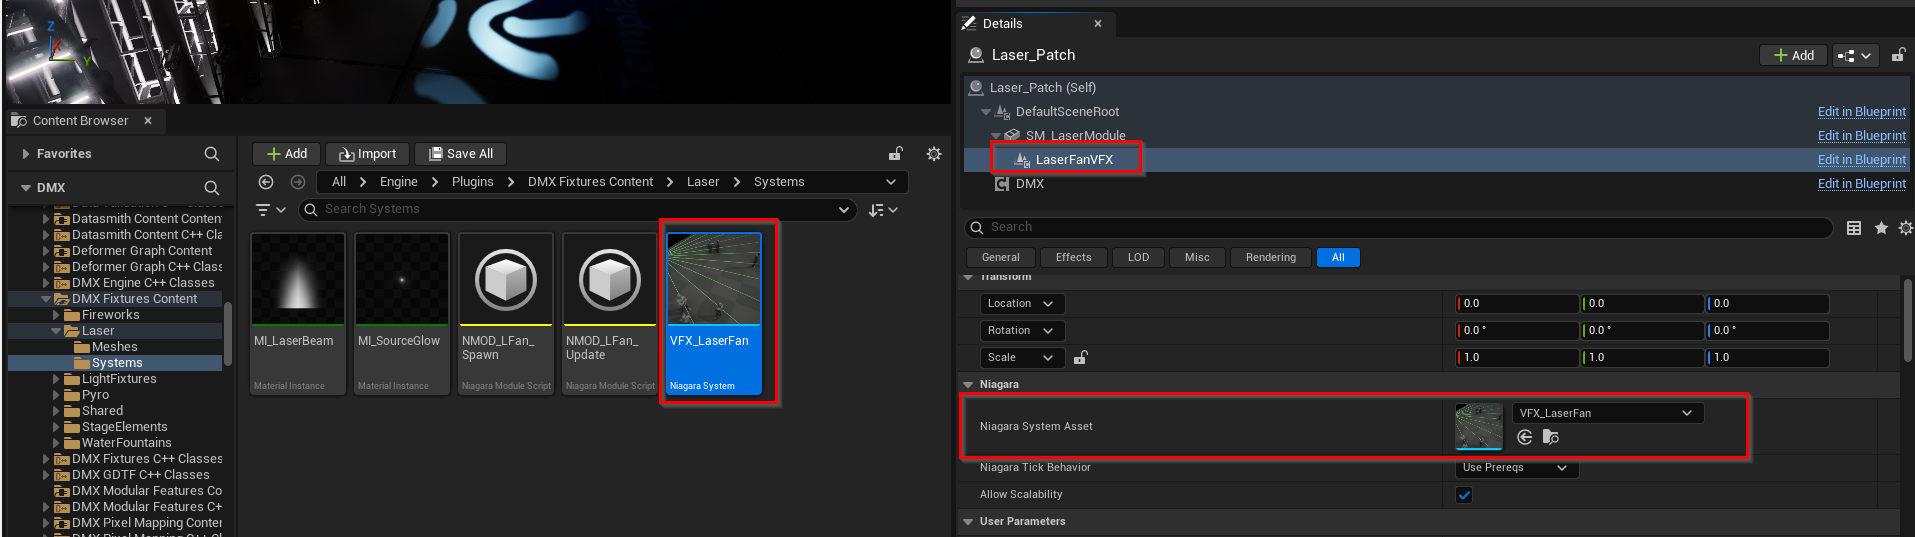
Each particle emitter within the system may have its own material, which you can find and select there: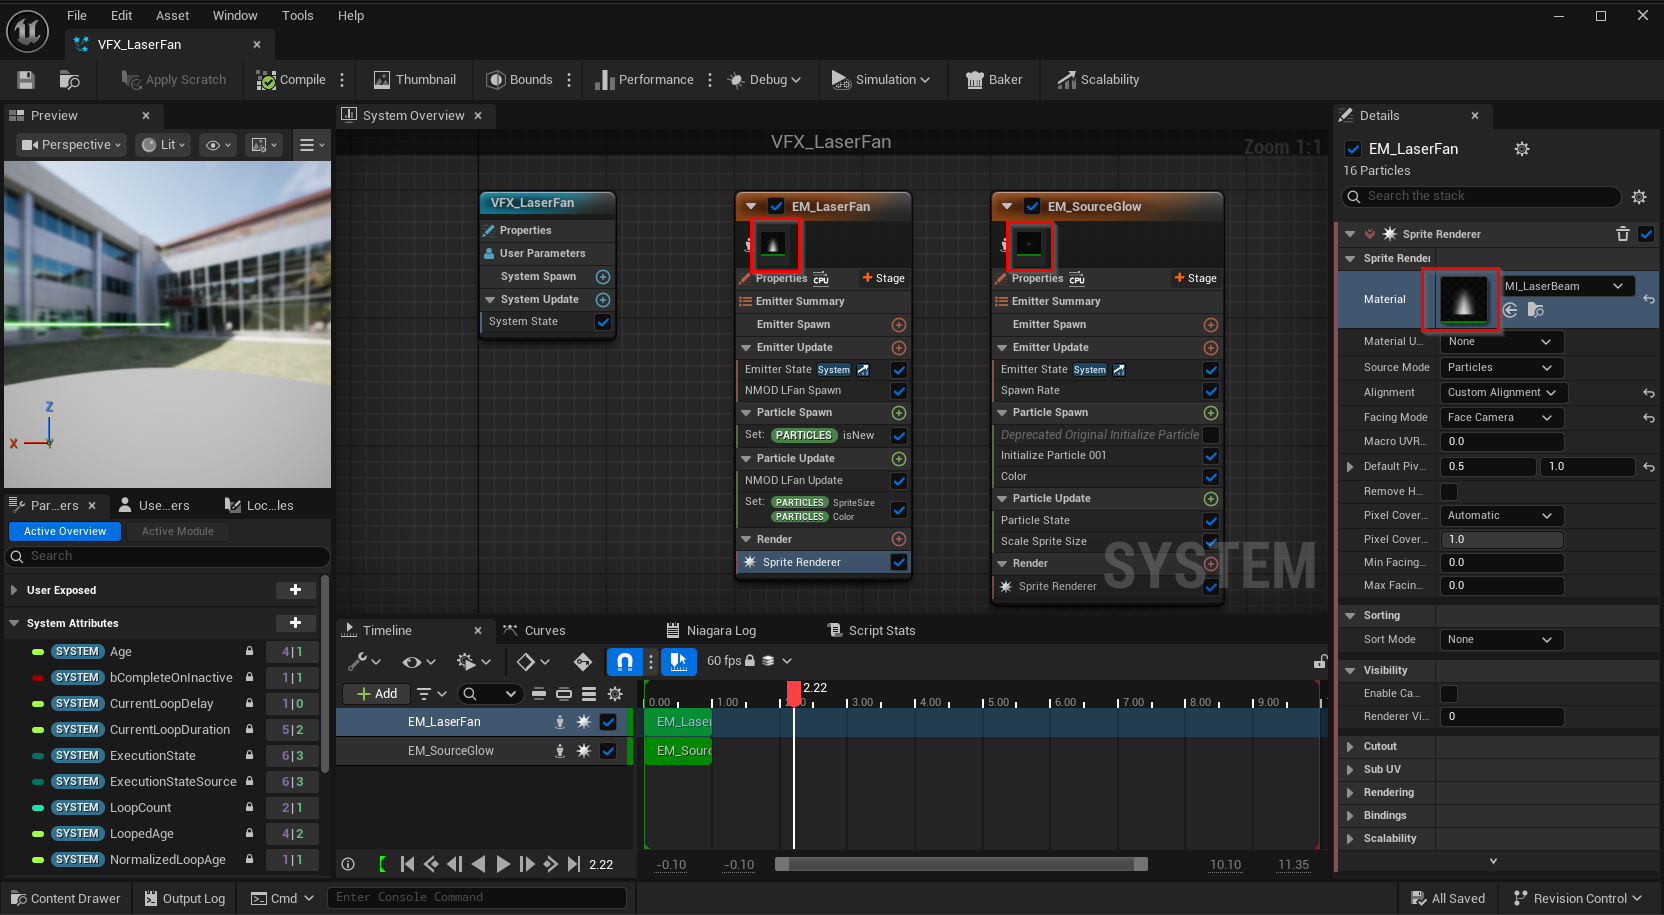
Sometimes, this assigned material is a variation, in that case, you need to select the Parent material to find the right material: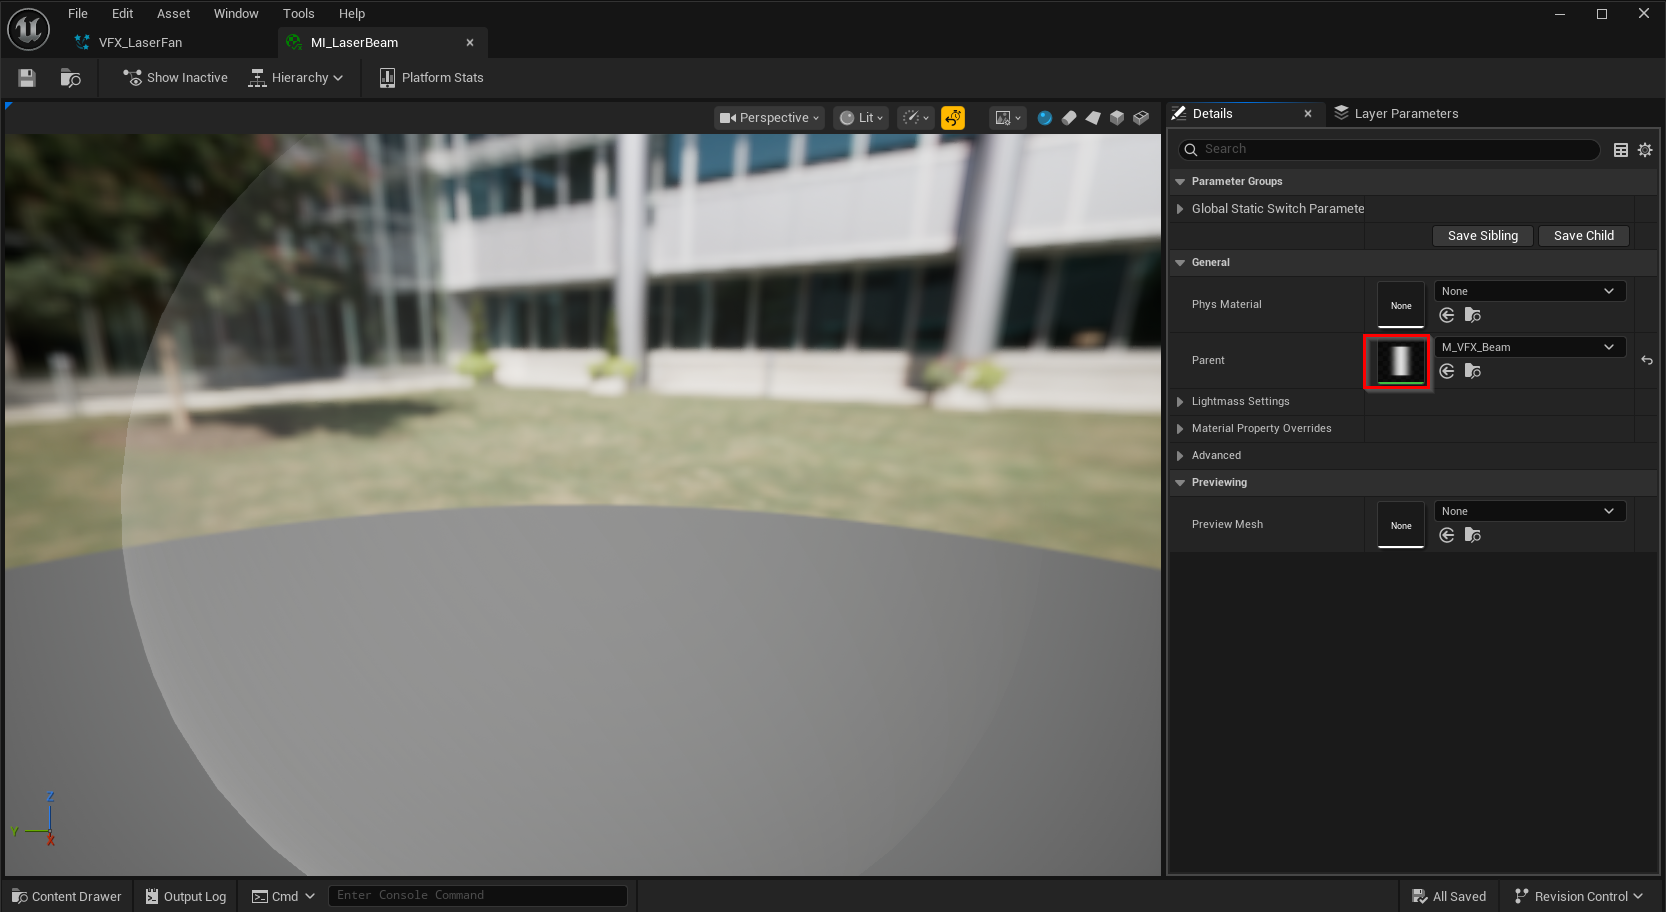
Once you’re at the correct material, enabling Allow Custom Depth Writes should allow the beam to render behind the Billboard as intended: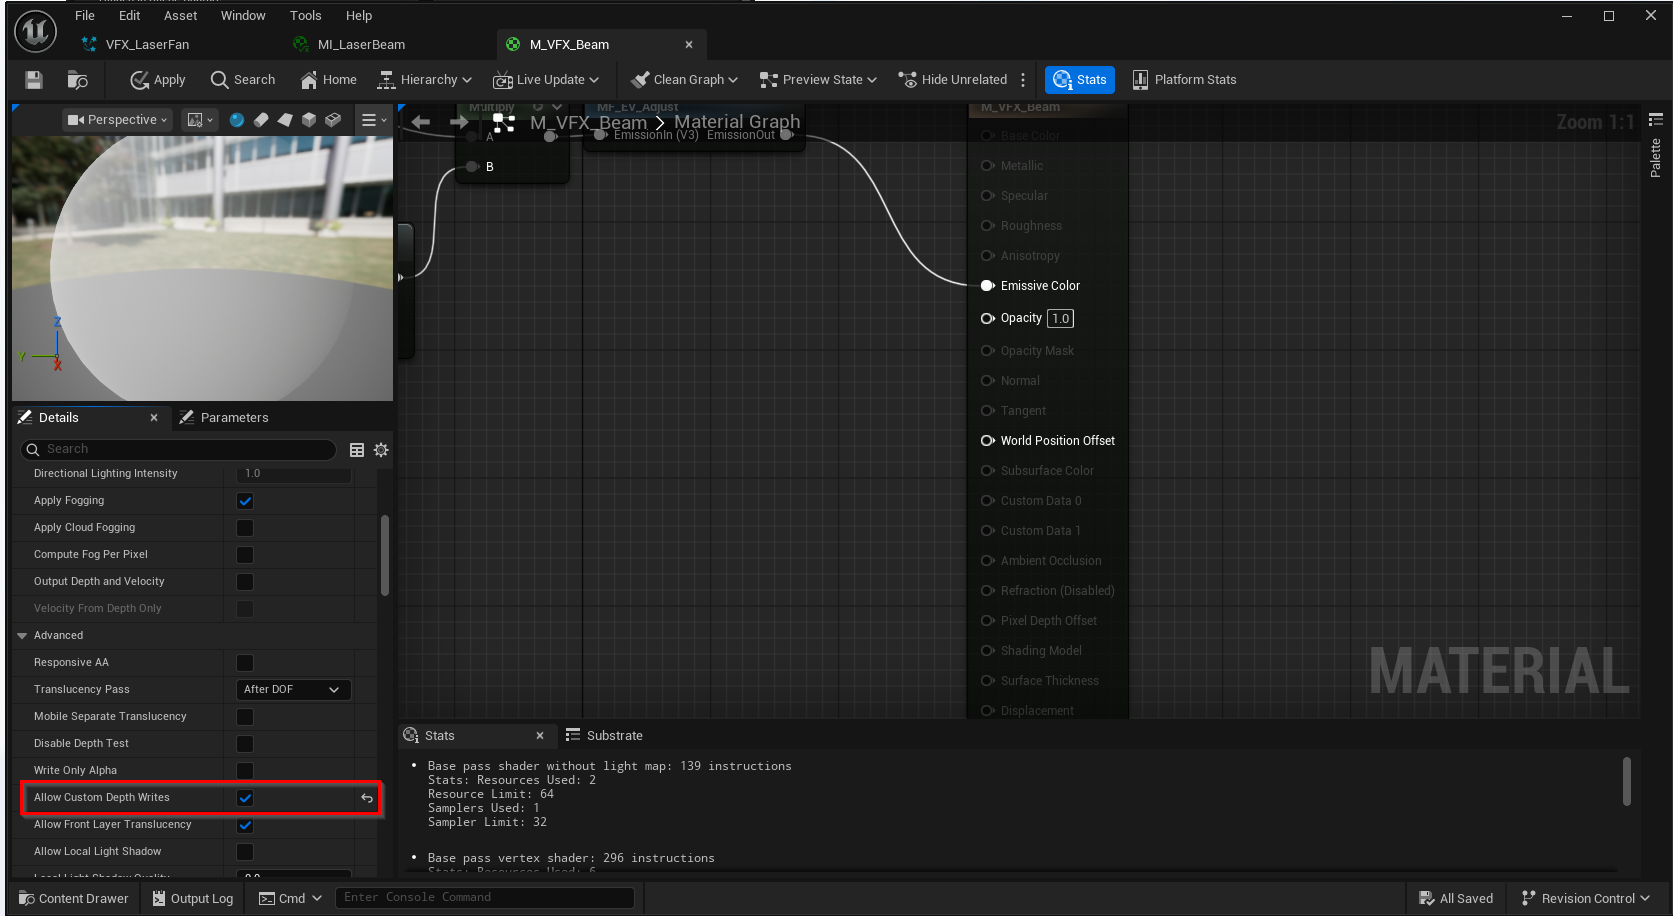
Warmest regards,
Tornado
-
Hello, first of all, thank you for the detailed explenation. The billboard is still infront of the niagara system and the ligth from the moving heads. I send some examples of the niagara system. I have set every material also every subcomponent to Allow Custom Depth Writes.


Eifert@Aximmetry
-
Hi,
In your third and fourth screenshots, you are editing an opaque material assigned to an opaque object, the launch box for the fireworks. I can confirm this because the object appears in the Static Mesh field: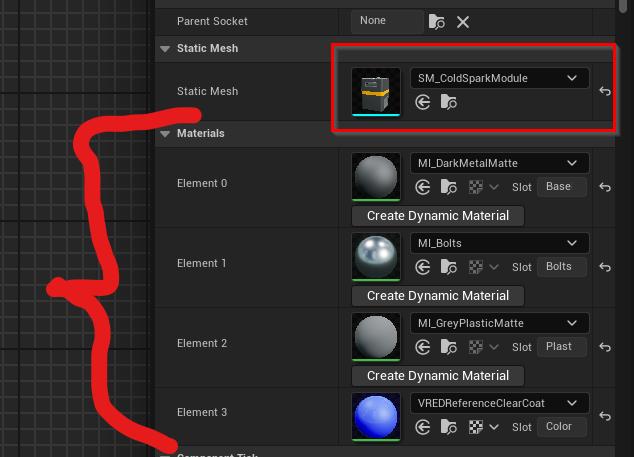
Additionally, the Translucency Pass option is grayed out in the material, which is an indication that the material is opaque:
Note that for opaque objects, you do not need to modify their material. Instead, in the Details panel, you need to enable the "Render CustomDepth Pass" option.
In the case of your Niagara particle system, as shown in your first and second screenshots, you likely need to set the Translucency Pass to After Motion Blur or at least to After DOF (Depth of Field), along with Allow Custom Depth Writes being enabled.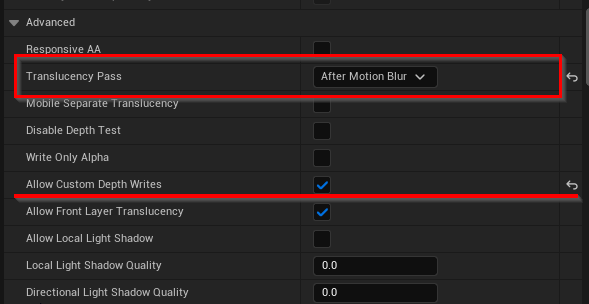
Note, some translucent materials don't have an issue when the pass is set to Before DOF, but I just tested this in a similar Niagara setup and encountered the same issue until I adjusted the Translucency Pass setting.
Warmest regards,
Tornado
-
Thank you. Everything is working except these 2 niagara systems.


This is one of the niagara system and how I have set every material.


Eifert@Aximmetry
-
Hi,
From your first two screenshots, it seems that the particle systems are working as expected. Is this the same Niagara particle system that you have a problem with, or is it a different one where you managed to fix it?
For the Niagara particle system that is still not working correctly, you can try to further isolate the issue. Apply the problematic materials to a simple object and check if the billboard is always over it. If it does, the issue is still within the material itself rather than the Niagara system. Otherwise, the particle system may use additional hidden materials or components.
If you’re able to share the particle system and the related assets, we can take a closer look and help troubleshoot.
Additionally, please check the material’s Blend Mode setting. Sometimes, rare blend modes, like AlphaHoldout, can cause unexpected things. You should make sure the Blend Mode is set to either Translucent or Additive for most particle effects.
Warmest regards,
Tornado
-
They are two seperate niagara systems.


Both systems use these materials and I have set all materials to Translucent pass to After motion blur and turned on allow custom depth pass and the blend mode is set to translucent
This is one of the assets:

And another question why does my image get so red after I changed it from keyed to final?


And one last question is in one of my niagara systems the box is greyed out and I cant change it to be behind the billboard. 
And why is my recorded video so blurry or it gets this blurr areas?

Eifert@Aximmetry
-
Hi,
Both systems are using the same materials, yet in one system the particle appears correctly in front of the billboard, whereas in the other it does not. That is indeed very strange. Based on the screenshot, it appears that the Niagara particle systems are exact copies of each other, with the only difference being the spawning setup for NE_Lead. Perhaps something in the NE_Lead emitter settings is causing this discrepancy?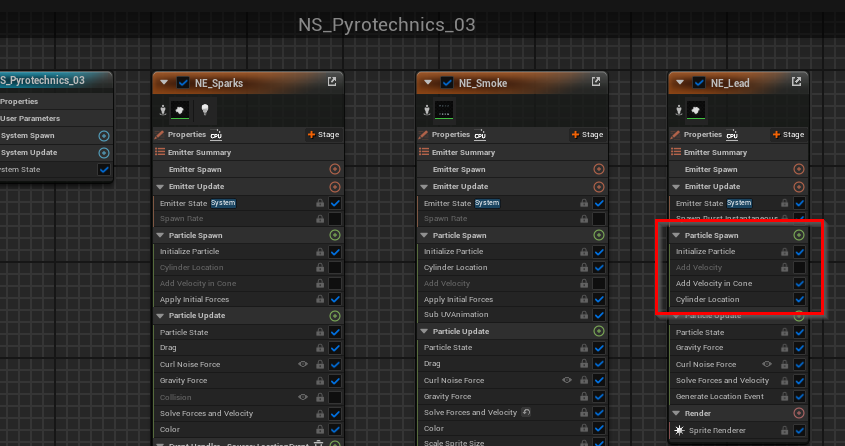
Regarding the box's material: the “Translucency Pass” option is grayed out because the material is set to Opaque. You shouldn't change opaque materials. Instead, select the pyro box object itself (the object with the material parameters). In the Details panel, navigate to Rendering > Advanced and set Render CustomDepth Pass to On.
As for your billboard image, I do not believe there is a keying issue. Instead, it appears overexposed in the scene. There can be several reasons for this. Try turning off Lit and Inverse Tonemap in the BILLBOARD panel and see if either option resolves the issue. More details can be found here: https://aximmetry.com/learn/virtual-production-workflow/green-screen-production/virtual-camera-workflow/setting-up-billboards-in-virtual-camera-compounds/#inverse-tonemap
Note: Inverse Tonemap is currently not supported in HDR rendering, and it may cause overexposure issues similar to what you are experiencing. Additionally, make sure the image is not overexposed in the ADJUSTER panel.
Regarding the blurry area in your image: I am not sure exactly which part you are referring to. From what I can see, it looks like there is a floor, which is highly reflective but somewhat blurry. This is to be expected, as reflections are not always crystal clear.
Warmest regards,
Hi,
If you are using Allow Virtuals, you need to enable the Render CustomDepth Pass for any objects that will appear in front of the Billboard (live input). Detailed instructions on how to do it can be found in the "Objects in Front of the Billboard" section here: https://aximmetry.com/learn/virtual-production-workflow/green-screen-production/aximmetry-de-scene-setup-green-scre
Warmest regards,