Can Aximmetry DE support 2.5D workflow?
For example, using image plates to create parallax effect when camera moves without the need for a full 3D generation. This can be achived with either Blender or Unreal?
Hi,
I think there are two ways you could do it:
In the case of having the camera move, you can set up something like this:
You would place the different images with the Scene Nodes and then animate a Camera movement with the Sequencer that is connected to the Camera Mover module.
As you can see, you can also add green screen footage to the Rectangles and key it.
With the Depth Of Field modules, you could easily add a focus effect to this setup.
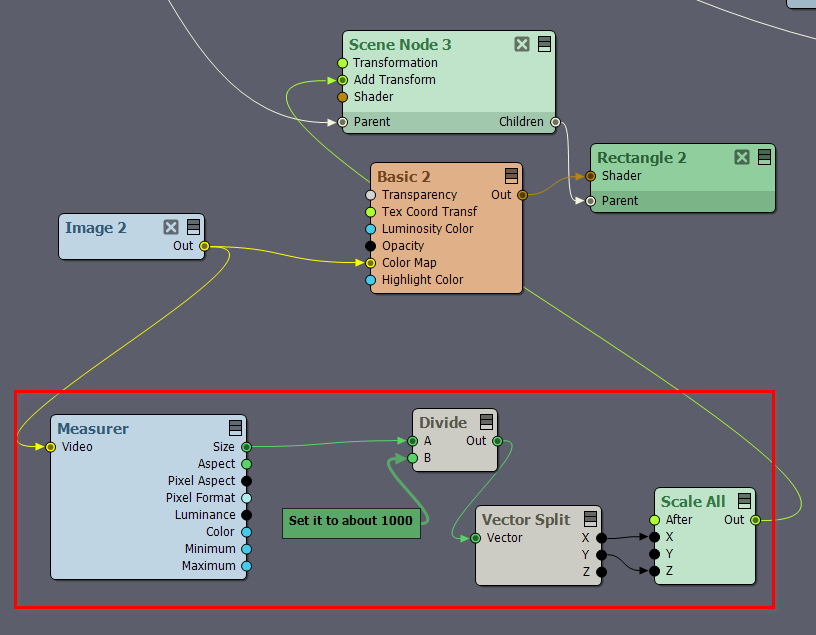
Note, to automatically set the right aspect ratio for the rectangles, you can add the following logic:
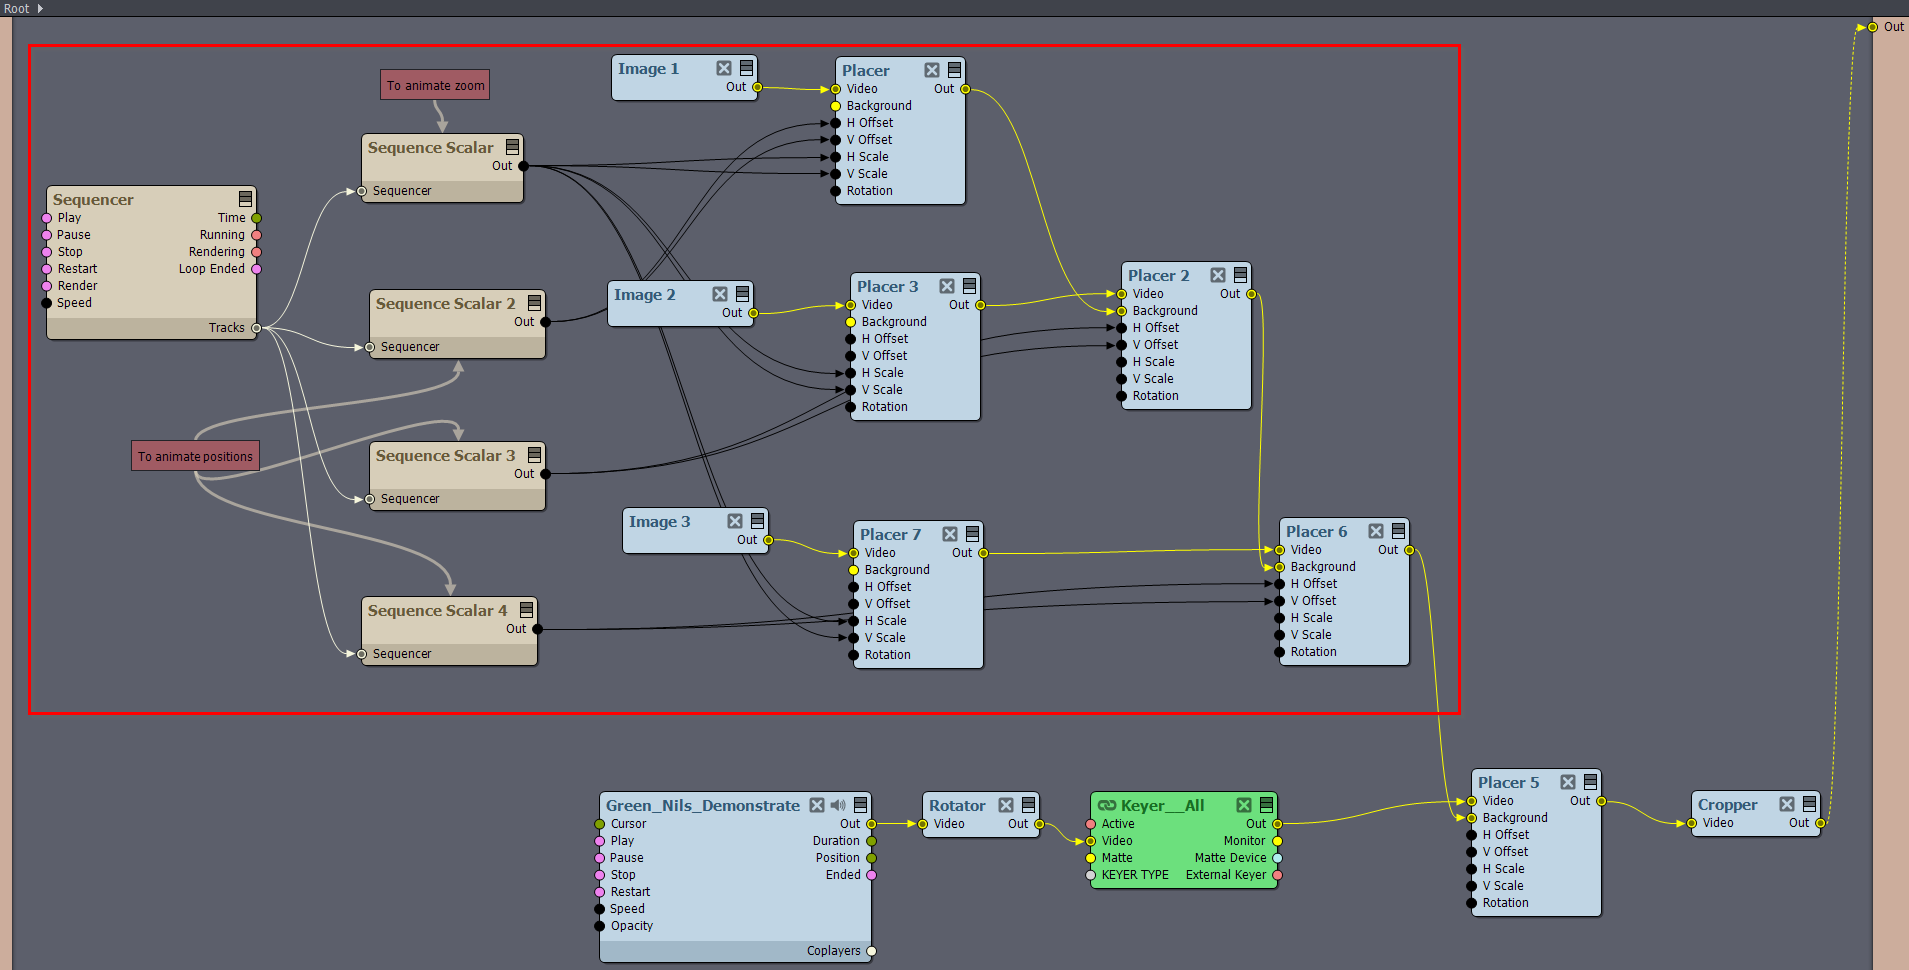
In the case of having the image plates move, you can set up something like this:
You can simulate a zoom effect by using a single animation (Sequence Scalar) to change the scale of Placer modules. This will enlarge or reduce the size of the image, creating a zooming illusion.
To achieve a parallax effect with sideways movement, you'll need to create a separate animation (Sequence Scalar) for each Placer module that blends together two images. This involves animating the position of each image to simulate depth and movement across the scene.
If your image is a repeating tileable texture, you can set the Repeat Type to Wrap in the Placer module. This will allow the image to tile seamlessly, ensuring a continuous pattern without visible edges:
You can use a Blurrer module on the individual images to simulate a focus effect.
We have documentation on the Sequencer here: https://aximmetry.com/learn/virtual-production-workflow/scripting-in-aximmetry/sequencing/sequencer-and-sequence-editor/
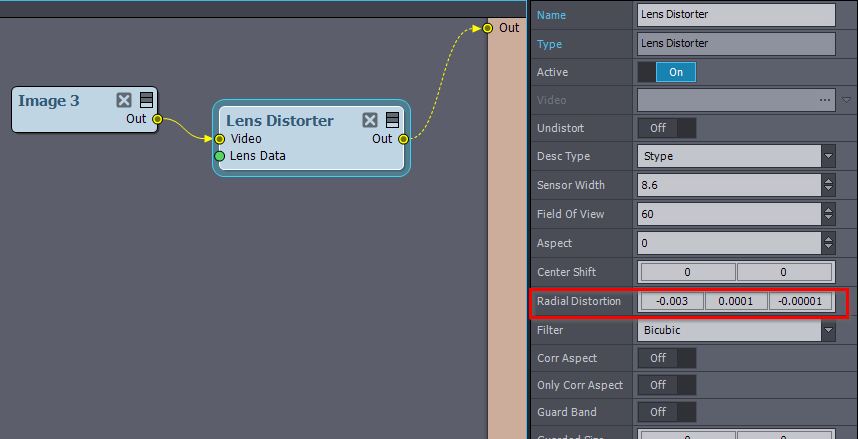
To add more realism, you could consider using the Lens Distorter module. You can use the Radial Distortion pin to simulate the effect of a camera lens changing as you zoom, adding an authentic lens characteristic that enhances realism during zoom animations.
Another way to use it would be to apply distortion to an image on one side of the final picture to create the impression that the element is slightly moving in space:
Warmest regards,
Hi,
You can create such an effect just by using the Placer or Blender modules.

However, you shouldn't hesitate to use 3D generation for this. Rendering rectangles for image plates using Aximmetry's render engine is not resource-intensive at all.
Moreover, you have the option to render in Orthographic mode as well:
If you can provide more details about the specific visuals you aim to achieve, I can guide you through the setup process in Aximmetry.
Warmest regards,